Copyright © 1994 John L. Tonry
Permission is granted to copy and distribute this document provided that this copyright notice is retained unaltered.
This document modified by Bruce W. Koehn, 2001 March 19.
Modifications are as follows: The MONGO2k notes have been merged into the 1994 manual. Missing subroutine documentation has been added. Some text has been modified or expanded.
MONGO is copyrighted software, but it is free for use and distribution. You may redistribute it and/or modify it under the terms of the GNU General Public License as published by the Free Software Foundation; either version 1, or (at your option) any later version.
This program is distributed in the hope that it will be useful, but WITHOUT ANY WARRANTY; without even the implied warranty of MERCHANTABILITY or FITNESS FOR A PARTICULAR PURPOSE. See the GNU General Public License ("COPYING") for more details.
You should have received a copy of the GNU General Public License ("COPYING") along with this program; if not, write to the Free Software Foundation, Inc., 675 Mass Ave, Cambridge, MA 02139, USA.
Please read these instructions if you modify this program or distribute less than the entire package. Briefly, no portion of this code nor derivatives from it may be offered as other than free software. If you modify the code you must retain the original copyright notice, and prominently show the nature of the modifications which you made along with the date.
This document describes MONGO, a program designed to produce high quality graphics output with a minimum of effort. There are four major sections: an introduction that covers the basic features and operating concepts of MONGO, a description of the interactive interpreter and commands, a section about the FORTRAN subroutines which comprise MONGO (which can be called from a user's program), and an appendix. MONGO is written in FORTRAN-77 (with minor extensions) and can be run on VAX computers running VAX-VMS as well as Berkeley UNIX systems.
MONGO consists of a number of subroutines to perform various
graphics functions, with an interactive program that can call the
subroutines and pass them arguments. There are three modes in which
MONGO can be used. The first and most common is interactive mode,
during which the interpreter program is run. In this mode, the user
types commands followed (possibly) by arguments, and MONGO will
execute the desired graphics function. For example, if the user
types
           relocate 0 0
           draw 3 5
MONGO will draw a line from the location (0,0) to (3,5).
The second mode is just like the first except that in this mode the
commands are passed to MONGO as a character array from another
program. This is known as "interpreter" mode. If the last command of
the character array is the command END, MONGO will return
directly to the calling program. Otherwise the user is left in
interactive MONGO until he explicitly exits. For example,
           character*50 com(3)
           com(1) = 'relocate 0 0'
           com(2) = 'draw 3 5
           com(3) = 'end'
           ncommand =  3
           call MONGO(ncommand,com,1,1,dummy)
could be inserted in a FORTRAN program to accomplish the same effect as above.
Finally, the third mode is to call directly the subroutines that
make up MONGO. This is more efficient than the other two modes because
it avoids the overhead of the interpreter, but it requires compilation
and, of course, is not interactive. When interactive MONGO becomes
prohibitively slow, or the interactive program becomes too complex, it
is best to use subroutine mode. In this mode, the above example would
be expressed as
           call mgorelocate(0.0,0.0)
           call mgodraw(3.0,5.0)
MONGO maintains two sets of coordinates. The first are the device coordinates. These are the physical coordinates that a given device will accept. Within the total range of acceptable graphics locations, MONGO maintains a rectangular "graphics area" which is the primary location where things are plotted. Usually this graphics area is not the entire range of which the device is capable; some space is allowed outside for labels. For example, if a device will accept values of 0 - 1000 for x and 0 - 800 for y, the graphics area might be defined to range from 200 - 800 in x and 100 - 700 in y. MONGO has reasonable defaults for each device that can be selected, and consequently the user generally does not need to change the location of the graphics area. However there is no reason not to change the graphics area if the user wants a plot of different size or aspect.
More importantly, there is a also a set of user coordinates, which
are arbitrarily defined coordinates that also refer to the graphics
area. It is with respect to these coordinates that the position of a
coordinate pair is calculated. For example, in the above case if the
user coordinates had been defined to range over 0 - 4 in x
and 0 - 100 in y, relocate 2 50 would
refer to the center of the graphics area, or location (500,400) in
device coordinates. Vectors and points which are plotted outside of
the graphics area are clipped off outside of the boundary. Characters
are allowed to be plotted anywhere that the device allows.
Data are passed to MONGO in different ways according to which mode is used. In interactive mode, MONGO expects a data file which is comprised of a number of columns. MONGO, by default, uses a token oriented read to get the data from this file. The only format requirements are that
In interpreter mode (when MONGO is called as a FORTRAN subroutine) data can be read from a file in the same way. Alternatively, a two-dimensional array can be passed to MONGO as part of the calling sequence and this array is treated exactly as if it were laid out in the same way as a data file. If the subroutines are called directly, arrays are passed directly to them.
In interactive mode, any unambiguous abbreviation for a command is acceptable, and MONGO does not distinguish upper case from lower case. Commands which are entered in interactive mode are saved in a buffer and can be listed, deleted, and new commands can be inserted in the buffer without being executed. There is a command playback which will re-execute all the commands which are stored in this buffer; this is useful for setting up a plot on a graphics terminal and then redoing it on a higher resolution hardcopy device such as a laser printer.
MONGO offers a macro facility, by which a new command can be defined as a sequence of previous commands or macros. Arguments can be given when a macro is executed and they will be passed to the commands that make up the macro.
Commands can be read from a file as well as being entered interactively, and the contents of the command buffer and individual macros can be written to a file. Often the best way to make a complicated plot is to make a number of attempts interactively, write the command buffer to a file, exit from MONGO, use a standard editor to edit the file of commands, re-enter MONGO, and then read the edited file.
MONGO is intended to be easy to use without compromising its ability to make intricate plots. In order to accomplish this, MONGO has a large vocabulary of commands but requires only a few for simple plotting tasks. This description is divided into four sections: the first covers the basics, the second the more involved plotting commands, the third the commands that deal with macros and the command buffer, and the fourth relates the most advanced plotting commands. There are a number of sample MONGO plots in the appendix that are instructive.
In order to invoke the interactive plotting program, type MONGO. An
asterisk prompt should appear; MONGO is now ready to accept commands.
At any point you can exit the program by typing END. If
MONGO has been installed correctly on your system you will not need to
make any assignments prior to running MONGO. If not, or if you wish to
take advantage of your own initialization, or if you wish to compile
MONGO into a program, see the Logical
assignments section in Chapter 3. Commands may be typed in upper
or lower case; MONGO does not distinguish between the two. Any unique
abbreviation is allowed; if the abbreviation is not unique, MONGO will
say so. If a command takes arguments, MONGO will not accept the
command line if it does not have the right number of legal
arguments. For example:
           $ mongo
           * t
           Ambiguous, choices are:
           terminal          ticksize
           * TERMINAL
           * relocate
           Insufficient arguments.  2 required.
           * end
           $
(In this and all other examples, "$" is the operating
system prompt [UNIX or VMS] and "*" is the MONGO prompt,
not typed by the user.) If an exclamation point followed by a space
appears in an input line MONGO will ignore it and the rest of the
input line. Examples of interactive commands will be presented in
lower case letters. Within textual command descriptions, the commands
will be written in a different font and in uppercase letters. Command
arguments will be written in lowercase letters.
Typing the command HELP will give a listing of all
commands and a one sentence description of each. If you type
HELP command where command is some
command that you are interested in, MONGO will repeat the one sentence
description as well as some other information. HELP is
particularly useful if you forget the order or meaning of the
arguments of some plotting command.
MONGO can direct its output to a number of different graphics terminals as well as a variety of hardcopy plotters. It is essential that you specify a device for output before any graphics output is generated by MONGO; otherwise the graphics output will be sent to your terminal whether or not it is a graphics terminal of the right sort, and MONGO will not be properly initialized.
The command to direct output to a terminal is
TERMINAL. TERMINAL can take zero, one, or
two arguments. When no arguments are specified, output will appear on
the current terminal with the default terminal type. MONGO will
interpret one argument as a terminal type and send output to the
current terminal with this terminal type. The current possibilities
for terminal type are:
| Type | Terminal Device |
|---|---|
| 1 | Retrographics 640 |
| 2 | DEC VT120/240 Regis |
| 3 | Tektronix 4010/4014 |
| 4 | Grinell 270 |
| 5 | HP 2648A |
| 6 | Sun Windows |
| 7 | X Windows |
Two arguments are used to specify both a terminal type and the name of a particular physical device. This is required to plot on a terminal other than the current one.
TERMINAL 7 provides reasonable support for the X11
Window environment. The following resources can be set in
.Xdefaults file or the X resource data base. Some
sensible defaults are suggested below.
	xmongo*Geometry:		792x612+0+0
	xmongo*background:		white
	xmongo*foreground:		black
	xmongo*screen:			0
        xmongo*visual:                  PseudoColor
For TERMINAL 7 the second argument can be
default for a native, resizable window. The second
argument can also be landscape or portrait
as described below.
Making a plot on a hardcopy device is fundamentally different than on a terminal. On a terminal MONGO immediately plots the results of the current command. On a hardcopy device, MONGO must store the plotting output and then put it out all at once when the plot is complete. This has two consequences: first, when plotting to a hardcopy device intermediate results are not visible, and second, you must explicitly tell MONGO when the plot is complete.
In order to make a plot on a hardcopy device, use the command
PRINTER. PRINTER takes zero, one, or two
arguments. When no arguments are specified the output will be sent to
the default printer in the default orientation. One argument is used
to specify the printer type and the plot orientation. The current
possibilities for printer type are:
| Type (n) | Printer Device | Orientation |
|---|---|---|
| 1 | Versatec | Portrait |
| 2 | Versatec | Landscape |
| 3 | Printronix | Portrait |
| 4 | Printronix | Landscape |
| 5 | PostScript | Portrait |
| 6 | PostScript | Landscape |
Odd n selects an output orientation that has x along
the short edge of the paper (portrait orientation), and even
n selects an output orientation that has x along the long
edge of the paper (landscape orientation).
If a second argument is present, it is passed, verbatim, to the
rasterizer script (e.g. psrast). Typically, the
rasterizer will create an encapsulated Postscript file if it sees a
.eps extension or a Postscript file for a
.ps extension. Otherwise the rasterizer treats it as a
printer queue, analogously to TERMINAL.
When you have finished the plot, type HARDCOPY to
close and save the plot file or to send the plot to the printer. If
you re-type PRINTER before typing HARDCOPY,
the plot will be re-initialized and all plotting output between the
two PRINTER commands is lost. If you exit from MONGO
before typing HARDCOPY, all plotting output is
lost.
TERMINAL 7 portrait and
TERMINAL 7 landscape are completely analogous
to PRINTER 5 and PRINTER 6, and
are intended to have identical characteristics (to within the
diminished resolution of the screen). Thus it should be possible to
preview an image on the screen prior to redoing it for the printer and
be confident that labels and points will be rendered the same way.
           $ mongo
           * term                  !Ask for default terminal type and present terminal
  (VMS)    * terminal 4 gra0       !Output an a Grinell (device GRA0:)
  (UNIX)   * terminal 3 /dev/ttyp0 !Output on a Tektronix terminal (device /dev/ttyp0)
           * printer 6             !Ask for output on a laser printer
           * printer 6 sample.ps   !Ask for a PostScript file
           * ...                   !Some random graphics output
           * hardcopy              !Print the plot on a PostScript printer
           *                       !or create a PostScript file
ERASE erases the screen of the current graphics
terminal. If the current device is a hardcopy device, the plot is
re-initialized.
DATA file opens a file called file
which contains data to be plotted. The data are actually read by the
commands XCOLUMN m and YCOLUMN n
where m and n refer to the columns which are
the x and y coordinates of the data points that are to be plotted. The
data are assumed to be arranged in columns with a given column
corresponding to a single coordinate. Default behavior requires that
there must be only numbers in a column, and each entry must be
separated from others by one or more blanks. (See the FORMAT command if your
data file doesn't conform to this.) The usual default is a maximum of
20,000 for the number of coordinate pairs that can be read at one
time.
If a file SQUARE.DAT existed which contained the data
| 0.0 | 0.0 | 0.0 | 0.0 |
| 1.0 | 1.0 | 1.0 | 1.0 |
| 2.0 | 4.0 | 8.0 | 16.0 |
| 3.0 | 9.0 | 27.0 | 81.0 |
| (etc.) |
and you wanted to plot a square function, you could type
           * data SQUARE.DAT
           * xcolumn 1
           * ycolumn 2
           * limits
           * box
           * connect
           * ...
If you wanted to plot a square root function you could have used
XCOLUMN 2 and YCOLUMN 1.
If you type an illegal file name or the name of a non-existent file, MONGO will say so. If MONGO encounters data that it can not read (such as non-numeric characters) it will tell you the line number where it occurred and list the offending line.
LIMITS sets the coordinates of the graphics area. Its
arguments are LIMITS xa xb ya yb,
where x ranges between xa (left) and xb
(right), and y ranges between ya (bottom) and
yb (top). If LIMITS receives no arguments,
it will use the minimum and maximum of the current (x,y)
data read by XCOLUMN and YCOLUMN (with a little
margin). Note, LIMITS does not change the size of the
resulting plot, but only affects the way the plot is labeled and the
coordinate system by which points are plotted in the graphics area.
Once limits have been set for the graphics area, the area can be
enclosed in a coordinate box by the command BOX. This
will put ticks on the inside of the box and coordinates below and to
the left of the box. The size of the labels and ticks can be altered
with the EXPAND command, and the spacing of the ticks
(and logarithmic axes) can be set by the TICKSIZE
command. The GRID command can be used to put a grid on
the box. BOX can also be given arguments to control the
orientation and fonts used for its labels; see the Advanced Commands section for a
description of this.
XLABEL string will write the label
string centered under the lower side of a coordinate box
made by BOX. YLABEL string will write
a vertical label centered to the left of the left side of the
coordinate box made by BOX. YLABEL places
its label a fixed distance from the left hand side of the plot; if the
placement needs to be adjusted, use RELOCATE,
ANGLE 90, and PUTLABEL 5 (described
below).
Once data have been read in by XCOLUMN and
YCOLUMN they may be plotted in three different ways using
CONNECT, POINTS, or HISTOGRAM.
CONNECT connects the points with straight line
segments. POINTS makes a point of the current style,
rotation, and expansion at each (x,y) coordinate.
HISTOGRAM makes a histogram of the data, plotting a
horizontal segment through each coordinate and connecting horizontal
segments with vertical segments. If you want different line weights or
styles, use LWIEGHT or LTYPE; if you want
different point styles, expansion, or rotation, use
PTYPE, EXPAND, or ANGLE. See
the Advanced Commands section for
instructions on how to hatch the area under a histogram.
CONNECT and POINTS commands accept zero,
one, or two arguments. If no arguments are present, the values of the
x and y arrays are assumed as arguments. If
arguments are present, they are single letters and are treated as
array references. If one letter is present, that array is used in
place of the y array as the ordinate. If two letters are
present, they are used in place of the x and
y arrays. Bad array references are silently ignored and
the x and y arrays are used. The example below
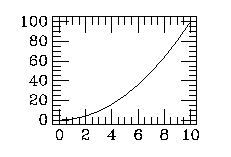
shows a histogram with the ordinate and abscissa labeled.
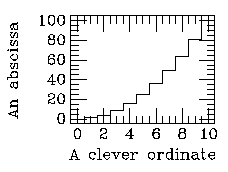
           ...
           data SQUARE.DAT
           xcolumn 1
           ycolumn 2
           limits
           box
           histogram
           xlabel A clever ordinate
           ylabel An abscissa
           ...
These commands are used to set variables that determine how lines,
points and characters are drawn. ANGLE and
EXPAND control the rotation (in degrees) and the size of
points and characters. ANGLE x will rotate points or
characters by x degrees counter-clockwise.
EXPAND x will make points and characters
x times bigger (or smaller) than the default (which is
EXPAND 1). See the Advanced Commands section for a method of
setting rotation angle without knowing the exact angle
required. EXPAND ex ey can be used to expand
the x and y directions individually. With negative argument(s)
EXPAND draws points with that radius measured on the x
axis. For example, EXPAND -5 requests that points be
drawn within a circle of radius 5, as defined by the scale on the x
axis. This also affects characters similarly, but only the fixed
width Tonry font (\t) uses the x axis diameter as a precise font
width.
LWEIGHT n controls the thickness of all line
segments (including those making up points and characters). Single
weight lines are drawn for n = 1, double weight
lines are used for n = 2, and so forth. When
n = 0, no vectors are actually drawn, although
MONGO moves the graphics cursor as though they were. This does not
apply to characters drawn by a terminal's internal character
generator, which are always drawn with line weight 1.
LTYPE n determines the line type. The line types
possible are:
| Index (n) | Line Type |
| 0 | solid |
| 1 | dotted |
| 2 | short dash |
| 3 | long dash |
| 4 | dot-short dash |
| 5 | dot-long dash |
| 6 | short dash-long dash |
PTYPE n s governs the current point
type. Points are always polygons, where n specifies the
number of sides. The parameter s determines the point
style. The possibilities are:
| Index (s) | Point style |
| 0 | open (vertices connected |
| 1 | skeletal (vertices connected to center) |
| 2 | starred |
| 3 | filled |
Thus PTYPE 4 0 calls for an open square,
PTYPE 4 1 calls for an "x" symbol,
PTYPE 4 2 calls for a four-pointed star, and
PTYPE 4 3 calls for a solid square. If
n is 1 the point is a single dot, and when
n is 0 no point is drawn. When
n gets large enough (10 or so), the polygon is a good
approximation to a circle. The ANGLE and
EXPAND commands are also used extensively in determining
point types. For example, to get a "+" symbol, use
PTYPE 4 1 to get a skeletal square (an "x") and
ANGLE 45 to rotate it by 45 degrees. The two
arguments n and s may be contracted together
into a single number. For example 4 2 can also be
given as 42. As described below under the PCOLUMN command, this
option is helpful when using symbolic or user variables.The example
below demonstrates the use of LWEIGHT,
LTYPE, PTYPE, EXPAND. AND
ANGLE.
           ...
           data SQUARE.DAT
           xcolumn 1
           ycolumn 2
           limits
           box
           lweight 5
           ltype 3
           connect
           lweight 1
           ltype 0
           ptype 3 3
           angle 20
           expand 3
           points
           ycolumn 3
           ptype 3 0
           angle -20
           expand 6
           points
           ...
NOTE: It is important to note that all these commands set
variables that do not change until explicitly set to something
else. Thus if you use EXPAND 3 to make a large point
and then type BOX, you will get a box with large
characters and tick marks. Another tricky way to go wrong is to make a
plot and then use PLAYBACK to redo it. If one of these
variables is set to something other than the default at the end of the
first plot, it will stay set for the beginning of the second plot
until it is explicitly reset. The only exception is that
BOX, XLABEL, and YLABEL do not
use ANGLE or LTYPE to determine the rotation
and style of the characters making up the labels.
When reading from a data file with XCOLUMN or
YCOLUMN, it is often the case that not all lines are
wanted. In this case LINES n1 n2 will cause
XCOLUMN and YCOLUMN to read only lines
n1 through n2 or the end of the file if
there are fewer than n2 lines. There are three cases
where LINES is essential. First, if there are data lines
that are not to be plotted (or if there are lines of text that MONGO
cannot read), they can be avoided with LINES. Second,
several plots can be made from the same data file, using the same
columns for x and y by using LINES. Finally, when the
MONGO interpreter is called from FORTRAN, the dimensions of the data
array that are passed must be the declared size of the array, so if
the array is not full of data it is necessary to use
LINES.
XCOLUMN and YCOLUMN have the feature that
if you give them the illegal column number 0, they will read the data
file line by line and list it on the terminal rather than putting the
data in an array. This is occasionally useful when you need to look at
a file and you do not want to exit from MONGO. See the Advanced Commands section for a
description of what MONGO does with negative column numbers.
RELOCATE x y is used to position the
internal graphics pointer to the location (x,y), where
x and y are referred to the current user
coordinates. DRAW x y will draw a line of the
current line type from the position of the graphics pointer to
(x,y). The location of the graphics pointer is updated to
(x,y). Several consecutive DRAW commands can
be used to make a number of connected line segments. Do not
intersperse other commands that can also change the position of the
graphics pointer, however. DOT will make a single point
of the current style, size and rotation at the position of the
graphics pointer. Any piece of a line segment or dot that is outside
of the graphics area will not be drawn.
LABEL string will make a label
string on the plot, with the characters starting at the
current position of the graphics pointer (set with
RELOCATE). The size of the label is governed by
EXPAND, and ANGLE determines the angle
between the text and the horizontal. The argument string
begins after one space following the command LABEL and
continues to the last non-space. The label will be centered
vertically on the current location.
There are a number of commands that MONGO will recognize when they
are interspersed with the text. These commands all begin with either
one or two backslash characters "\", and are followed with a single
character (or a single character and a number, in the case of
\jn). If one backslash is used, the command will be
applied to just one character following the command; if two
backslashes, the command stays in effect until countermanded or until
the end of the label. The following commands are possible:
| \\* | set mode * |
| \* | set mode * for next character |
| \r | change to Roman font |
| \p | change to Plain font |
| \g | change to Greek font |
| \s | change to Script font |
| \t | change to Tiny font |
| \o | change to Old English font |
| \i | toggle italics (slanting) on or off |
| \u | shift up for superscript |
| \d | shift down for subscript |
| \b | back up the width of the following character(s) |
| \w | draw a box in place of the following character(s) |
| \e | end of string |
| \c | end with a "carriage return" |
| \a | toggle advance with next char (allows overprinting) |
| \jn | justify character (as in PUTLABEL) |
| \0-\9 | insert value of user variable |
| \l(n) | insert n-th user label |
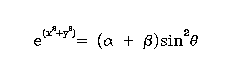
The font selection commands \r, \p, \t, \g, \s, and \o select different fonts; the font table in the Appendix shows which symbol corresponds to which typed character. The tiny font uses a minimal number of vectors to make characters and is therefore particularly legible at small expansions; it is also the only fixed width font. Any character can be italicized by slanting, except for lower case roman (which is a true italic). The command \i will cause the next character to be italicized. The command \\i will italicize all ensuing characters until another \\i is encountered. (Note that this toggles italics on and off and thus is conceptually different from shifting to a different font.) The superscript and subscript commands \u and \d will shift the text line up or down and decrease its size. When these modes end the text is returned to the previous baseline and expansion. \b will back up the current position of the graphics pointer the width of the following character. \\b will cause MONGO to back up the width of all following characters until another \\b is encountered. \w causes the next character to be replaced with a box of the same width as the character and whose height is that of the entire font. \\w causes all text (until the next \\w) to be replaced with a single box. This can be used with the FILL and COLOR commands to clear a space for a label. \e is used to end a command and is sometimes useful when running interactive MONGO to append trailing spaces to a label, but can be very helpful when passing a string to MONGO from FORTRAN, because the end of the string can be defined without filling the remainder of the string with blanks. \c is identical to \e, except that the graphics pointer will be left at the beginning of the label, moved down by one font width, as opposed to the end of the label. As an example, the command
* label e\\u(x\u2+y\u2)\\d= (\ga + \gb)sin\u2\gq
If \0 - \9 appears in a label it will be replaced with
the value of that user variable; if \l(n) appears in a
label it will be replaced with that user label string (see the SET command for a
description of these).
PUTLABEL n string is just like
LABEL except that the number n governs how
the string is justified with respect to the current graphics pointer.
n can range from 1 to 9, and the justification selection
is laid out as follows:
| string | ends | centered | starts | at pointer |
|---|---|---|---|---|
| above pointer | 7 | 8 | 9 | |
| centered on pointer | 4 | 5 | 6 | |
| below pointer | 1 | 2 | 3 |
For example, n = 1 means justify the string
so that it ends at the current pointer and lies below the current
pointer, and n = 6 is identical to
LABEL.
LABEL and PUTLABEL write strings directly
using a terminal's internal character generator when
EXPAND is set to 1 exactly,
ANGLE is 0, and
EXPAND to 1.0001 or put \e at
the end of the string.
A trick that is often useful in locating labels is to set the user
coordinates to something simple and RELOCATE with respect
to these coordinates. For example,
           * limits 0 1 0 1
           * relocate .05 .9
           * label plot no. 1
           * limits 0 1 0 1
           * relocate .05 1
           * putlabel 9 plot no. 1
RELOCATEcommands outside of the
graphics area are allowed and so can be used to put labels outside of
the graphics area.
LOCATION xa xb ya yb is used to
set the location and size of the graphics area within the coordinates
that are allowed by the device. (xa,ya) and
(xb,yb) are the coordinates of lower left and upper right
coordinates of the graphics area in device coordinates.
Unfortunately, this means that LOCATION arguments that
are appropriate for one device will be wrong for another. One way to
choose LOCATION coordinates is to select the desired
output device and use SHOW to examine the device's
limiting coordinates. The default LOCATION coordinates
are also a helpful guide in choosing new ones. There are also clever
methods to do device independent relocations which are explained in
the Advanced Commands section.
The WINDOW command is a means of selecting a
subsection of the current graphics area as the new current graphics
area. WINDOW can take between zero and four arguments.
The number of arguments defines a mode for the command. The modes are
outlined in the following table:
| Number of arguments (Mode) | Mode description |
|---|---|
0 - WINDOW | Selects the previous subarea |
1 - WINDOW k | Selects a pane. |
2 - WINDOW nx ny | Defines panes in the graphics area. |
3 - WINDOW nx ny k | Defines panes in the graphics area and selects a pane. |
4 - WINDOW x1 x2 y1 y2 | Defines and selects a subarea of the current pane. |
MONGO uses WINDOW nx ny to divide the total
graphics area into nx horizontal and ny
vertical pieces of equal size called panes. The panes are designated
from 1 to (nx * ny) starting from
the lower left corner indexing left to right, row by row.
WINDOW nx ny k not only defines the panes
but selects pane k. Pane k then becomes the
current graphics area. WINDOW k selects the
kth pane as the current graphics area. To reset the
graphics area to its original location before WINDOW was
invoked, use the command WINDOW 1 1 1.
Normally, the panes are separated by a small gap but the gap can be
eliminated in the x direction if nx is negative
and in the y direction if ny is negative.
WINDOW x1 x2 y1 y2 is used to
define a new graphics area within the current graphics area
(pane). The lower left corner is defined by (x1,y1)
and the upper right corner is defined by (x2,y2). A
graphics area defined by this mode is not indexed. However, the
graphics area previously defined using this mode can be made the
current graphics by entering the WINDOW command with no
arguments.
PAGE n is used with the PRINTER
command to select a different page of paper for
output. n = 0 selects the first page,
n > 0 selects subsequent
pages. PAGE accomplishes its effect by adjusting the
location of the graphics area, so output can be directed freely to any
output page, and the result on roll paper will be the same as on sheet
paper. On the other hand, page does not use the formfeed capability
of the Versatec and the Versatec does not maintain complete accuracy
in feeding paper so that there will generally be a gradual creep of
the plot's location over a span of several pages.
PHYSICAL xa ya xb yb is analogous
to LOCATION except that the device coordinate limits are
being set. This is generally useful only in adjusting the limits
allowed on a Versatec plot in the direction that the paper is fed. For
example, on a Versatec, PAGE 1 is equivalent to
PHYSICAL 0 2111 0 3400. If you want
a very long plot on roll paper using a Versatec, the best way to do it
is to use PRINTER 1 and PHYSICAL to
allow whatever length desired.
PAGE and PHYSICAL have been overtaken by
technology and now are essentially obsolete, although
PHYSICAL can be useful for setting a clipping box for
labels.
MONGO provides several commands to affect the way that a coordinate
box is made. TICKSIZE sx bx sy by
controls the spacing of the tick marks made by
BOX. sx refers to the interval between small
tick marks on the x axes, bx refers to the interval
between large ticks (and labels). sy and by
control the spacing of ticks on the y axes. For example, if you use
LIMITS 0 60 0 1, MONGO might
ordinarily provide ticks on the x axis separated by intervals of 2 and
labels separated by 10. If you wanted intervals of 1 and 6, you could
use TICKSIZE 1 6 0 0. If
sx or sy is 0, the axis routine will supply
its own intervals according to the label limits. If sy or
sy is less than 0, the axis will have logarithmic tick
spacing with large ticks at each decade and small ones at each
integer. When sx or sy is less than 0,
BOX assumes that the limits are logarithms, e.g., -2 and
2 refer to limits of 0.01 and 100.
GRID can be used without an argument in order to make
a grid of dotted lines at every major tick mark. Alternatively,
GRID n will make a grid at every major tick mark in
the current line type for n = 0, and at every
tick mark n = 1. If GRID has an argument it
will use the current line type; without one it always draws dotted
lines.
ID is used to label a plot with the time and date. It
will write the name of the currently open command file, the currently
open data file, the date, and the time just above the upper right-hand
corner of the coordinate box.
When data have been read by MONGO with XCOLUMN and
YCOLUMN, the commands XLOGARITHM and
YLOGARITHM can be used to take the logarithms of this
data. If any data are zero or negative, XLOGARITHM and
YLOGARITHM will replace it with -50 instead of a
logarithm, since this will generally place it well off of any
plot. XLOGARITHM and YLOGARITHM have no
effect on the coordinate limits, so the limits chosen should reflect
the range of the logarithms, not of the original data itself.
Four other commands that can read data from a data file are called
UCOLUMN, VCOLUMN, PCOLUMN, and
ECOLUMN.
UCOLUMN m and VCOLUMN n are
very similar to XCOLUMN m and
YCOLUMN n. UCOLUMN and
VCOLUMN read data into the u and
v user arrays. Those commands that assume x
and y as arguments (CONNECT, POINTS) can
also be used with u and v but the arguments
must be explicitly stated (as in CONNECT u v).
PCOLUMN n is used to read data from column
n into the p array. The data are used as
point types for corresponding x and y values when POINTS
is executed. Three pieces of information are compressed into a single
number. First, the tens (and hundreds) digit is used for the number of
sides of the point. The units digit is used for the point style, and
any fractional part other than zero is used as an expansion
factor. For example, an entry of 103.5 read by PCOLUMN is
interpreted as a request for a filled decagon of half the current
expansion (PTYPE 10 3,
EXPAND 0.5). Fractional parts less than 0.01 are
treated as null, leading to a full sized point.
PCOLUMN can also take up to four arguments to specify
expansion, color, and angle from other columns:
PCOLUMN n e c a. If a column
argument is 0, the current default for that attribute is
used when the points are plotted. For example,
PCOLUMN 2 3 0 5 would read point
types from column 2, point expansion from column 3 (values may range
between 0.01 and 100), assign the default for color, and read point
angle (in degrees) from column 5.
A PTYPE command overrides a previous
PCOLUMN, and all points are plotted according to the
uniform PTYPE. If PCOLUMN is invoked with
no arguments, it restores the use of PCOLUMN for
determining point attributes.
ECOLUMN n reads data from column n
into the e array. The data are interpreted as the
magnitude of an error bar. It is used with
ERRORBAR k which draws errorbars at all the current
(x,y) locations. If k is 1, the
error bars extend in the direction of the positive x axis;
2 is for positive y axis, 3 for negative x
axis, and 4 is for negative y axis. Thus to draw
symmetrical vertical errorbars on a set of points, use
ERRORBAR 2, ERRORBAR 4. Note that
the POINT routine is used to make the cross bar on the
error flags, so that if you don't want a cross bar you can avoid it by
using EXPAND 0. The analog of
XLOGARITHM for ERRORBAR is to use negative
arguments. Thus ERRORBAR -4 assumes that the y
array contains logarithmic data y' but the error array has linear
errors dy read by ECOLUMN, and will plot segments of
length log(10y'-dy).
COLOR command can be used with one or four arguments
to choose a color for subsequent drawing (although it is currently
only implemented for X Windows and color Postscript). MONGO maintains
a palette of 32 colors and COLOR n selects color
n (0<=n<=31).
COLOR n r g b both selects color
n for use as well as setting that palette value to
r,g,b where these values range between 0 and 1. MONGO
uses an additive red, green, blue (r,g,b) model. Thus
COLOR 2 1 0 0 chooses color 2 and
sets it to red, and COLOR 3 0 0 0
chooses color 3 and sets it to black. Color 31 is reserved for the
background color, so setting it will change the background color.
There are some differences between the behavior of a terminal and a
printer. Changing a palette entry will immediately change the color
of lines previously drawn on a terminal according to that palette
entry, whereas there will be no retroactive effect with a printer.
Also, no distinct background color is defined for a printer since the
color of the paper itself defines the background color. The paper
color is assumed to be white (or light color) and every
pallette entry is black. Note that, like EXPAND or
LWEIGHT, COLOR remains effective until
explicitly changed, and can cause strange effects on
PLAYBACK.
The FILL n command asks for contours defined by
RELOCATE, DRAW, ..., DRAW sequences to be
filled with pattern n (although it is currently only
implemented for X Windows and Postscript). If the sequence does not
close on itself, MONGO connects the endpoint to the starting point.
An argument of 0 ends the fill mode, and valid patterns
range between 1 and 20 inclusive:
| Code (n) | Pattern | Code (n) | Pattern |
|---|---|---|---|
| 1 | solid | 11 | wide left slant lines |
| 2 | 75% gray | 12 | wide right slant lines |
| 3 | 50% gray | 13 | narrow grid |
| 4 | 25% gray | 14 | wide grid |
| 5 | narrow vertical lines | 15 | diagonal grid |
| 6 | narrow horizontal lines | 16 | small bubbles |
| 7 | wide vertical lines | 17 | large bubbles |
| 8 | wide horizontal lines | 18 | Escheresque weave |
| 9 | narrow left slant lines | 19 | basket=weave |
| 10 | narrow right slant lines | 20 | mixed bubbles |
Any command other than DRAW will terminate a sequence
and cause the area to be filled, so if POINTS is executed
with fill mode on, for example, each point will be individually filled
since each is comprised of a RELOCATE, DRAW
sequence.
There are times that it is desirable to defer the completion of a
fill path, for example, in order to fill the area between two curves
drawn with CONNECT, or when a curve might leave the
graphics area (thereby incurring a RELOCATE when it
reenters the area). To address these situations FILL can
take two arguments FILL n 1, where the 1
indicates that the path to be filled is finished only when a
FILL 0 command is encountered. For example, in
order to fill between a curve and y=0 (see the SET command for an
explanation of the non-numeric arguments below):
           * fill 9 1        ! Turn on fill mode (left slant lines)
           * connect         ! Draw the curve
           * draw x 0.0      ! Draw a segment from the end to y=0
           * draw x(1) 0.0   ! Draw a segment back to the start
           * draw x(1) y(1)  ! Draw back to the beginning of the curve
           * fill 0          ! Cause the fill and end fill mode
MONGO uses an opaque fill, so any fill completely obscures what
lies below. This can be quite useful both for clearing an area (by
solid filling with the background color) as well as achieving various
effects. For example, to draw a label with an area cleared underneath
it:
           * color 31                 ! Select background color
           * fill 1                   ! Turn on fill mode (solid)
           * label \\wThis is a test  ! Clear the area underneath
           * fill 0                   ! End fill mode
           * label \\bThis is a test  ! Back up to the starting point
           * color 0                  ! Choose a foreground color
           * label This is a test\\e  ! Draw the label
An effect sometimes used in drawing points is to have error bars
end at the boundary of the point, and have a line connecting the
points erased for a small area around each point. This can be
achieved by:
           * connect                   ! Draw the connecting line
           * set expand expand * 1.5   ! Enlarge points a bit
           * color 0                   ! Select background color
           * fill 1                    ! Turn on fill mode (solid)
           * points                    ! Erase the curve around the points
           * fill 0                    ! Turn off fill mode
           * set expand expand / 1.5   ! Back to old expansion
           * color 31                  ! Choose a foreground color
           * errorbar 2                ! Draw +y errorbar
           * errorbar 4                ! Draw -y errorbar
           * color 0                   ! Select background color
           * fill 1                    ! Turn on fill mode (solid)
           * points                    ! Erase the error bars around the points
           * fill 0                    ! Turn off fill mode
           * color 31                  ! Choose a foreground color
           * points                    ! Finally draw the points
Of course, the curve could also be erased where it is crossed by an errorbar by drawing the errorbar in the background color at a heavy line weight. Note also that if a point is to be filled with one color and bordered by another, the fill must be done first since it will erase (at least part of) the border.
The command LCOLUMN n is used to read text
strings from column n of a data file into the user string
array l. The default storage for these strings is 1000
strings of no more than 40 characters. These strings can then be
drawn at locations determined by XCOLUMN and
YCOLUMN using the command LPOINTS. Text
containing blanks is treated as a single string by enclosing it in
quotation marks ("). These user labels can also be inserted into
MONGO labels as \l(n).
The attributes derived from PCOLUMN are also
applicable to LPOINTS, except that the "point type" is
interpreted as a justification similar to PUTLABEL. As
with POINTS, the effect of PCOLUMN can be
disabled with an explicit PTYPE.
LPOINTS can also take two arguments,
LPOINTS nf str. The first argument,
nf, specifies the justification and formatting of the
label. The second argument, str, is a character string
that will be pre-pended onto every plottable label.
The nf argument can be one or two characters. The
first character, n, is a number between zero and nine and
has the same meaning as the justification argument for
PUTLABEL. If this argument is specified, the
justification specified by the p vector is ignored. The
second character, f, can be b,
l or d. If its value is b, the
string is boxed. If its value is l, a line is drawn
between the label and it corresponding point. If its value is
d, the label is boxed and and a line is drawn.
NOTE: In crowded label fields, collisions between labels can become common. In this case, you should use the special justification code, 0, which tells MONGO to attempt to align labels without collisions.
The second argument, str, is a string that will be
pre-pended onto every plottable label. Thus it is possible to do
interesting things like specify a font change (\\p) for a label.
The nf argument can omit either the n
part or the f part or both but if both are present there
must be no intervening spaces. If the first argument does not begin
with a digit or the letters b, l, or
d, then it is treated as the second argument,
str.
A table may help clarify all the possibilities.
| Argument 1 possibilities |
Argument 2 | Result |
|---|---|---|
| <digit> | Label aligned by <digit> code | |
| <b, l, or d> | Label boxed, lined or both Label aligned by p vector code or default alignment if no p vector |
|
| <digit><b, l, or d> | Label boxed, lined or both Label aligned by <digit> code |
|
| <digit> | <string> | Label aligned by <digit> code
<string> pre-pended to labels |
| <b, l, or d> | <string> | Label boxed, lined or both Label aligned by p vector code or default alignment if no p vector <string> pre-pended to labels |
| <digit><b, l, or d> | <string> | Label boxed, lined or both Label aligned by <digit> code <string> pre-pended to labels |
| <string> | Label aligned by p vector code or default alignment if no p vector. <string> pre-pended to labels |
Notice that you may not pre-pend a string that begins with a digit
or the letters b, l, or d
without specifying an alignment or a format.
The INFO command takes zero, two or three arguments.
INFO x y finds the point which is closest to
(x,y), sets the user variable \0 (see the
SET command in the Advanced
Commands section) to the array index where it is found, and lists
values from the various arrays. If INFO has a third
argument of zero (INFO x y 0), printing is
suppressed and the only action is to set \0.
With no arguments, INFO enters the cursor mode.
INFO activates the cursor and provides a continuous
display of the cursor position, and the array index, x
and y array values, and label (if defined) of the nearest
point to the cursor. When a key is struck, the symbolic variables
cy and cx are set, and (if desired) can be
used as arguments to another invocation of INFO to set the user
variable \0. The example below shows how to set
cx, cy and \0 from the cursor
mode.
           data example.dat   !Name the data file.
           xcolumn 1          !Read the x data.
           ycolumn 2          !Read the y data.
           limits             !Set limits.
           box                !Draw a bounding box. Suppose we
                              !see 0<=x<=1 and 0<=y<=1.
           connect            !Draw the curve between consecutive points.
           info               !Enter the cursor mode
                              !As we move the cursor over the plot, we
                              !see the nearest x and y point and the
                              !coordinates of the cursor in real-time
                              !By depressing a key, cx and cy are defined
                              !with the current cursor coordinates.
           info cx cy 0       !Now \0 contains the index of the x and y
                              !point closest to the cursor.
SHOW is a routine that will display the value(s) of
various user-accessible variables. Without arguments,
SHOW provides values for several commonly used
variables. For example, typing SHOW after a Tektronix
terminal has been selected for output will produce:
User   (0.500,0.500)        User      0.000 (x) 1.00         0.000 (y) 1.00
Device ( 550, 415)          Device     100 (gx) 1000           80 (gy) 750
Cursor ( 0.000, 0.000)      Limit        0 (lx) 1024            0 (ly) 780
 EXPAND =  1.0  ANGLE =  0.0  LTYPE = 0  LWEIGHT = 1  PTYPE =  0.0  NUMDEV =  3
LINES 0 0         \0-\4 = 0.0000     0.0000     0.0000     0.0000     0.0000
The line labeled "User" lists the current position of the graphics
pointer in user coordinates (.5,.5) and the current user limits of the
graphics area (0 to 1 in x, 0 to 1 in y). The second line (labeled
"Device") lists exactly the same information in the device coordinate
system. The third line gives the user coordinates of the current
cursor position and the limiting device coordinates. The next line
includes the current value of the expansion parameter, rotation, line
type, line weight, point type, and the current device number (positive
numbers indicate terminals, negative numbers indicate printers). The
last line lists the range of lines that will be read from a data file
(from the LINES command), and the values of the first
five user variables.
If SHOW has an argument it is interpreted as a user
variable (see the SET
command in the Advanced Commands section) and its value is listed. If
the user variable is a vector with no index, SHOW
displays the first element of the vector. If the variable is not
defined, SHOW echos the requested variable name (which
can be useful for macros).
CURSOR is used to set the current graphics
location to the position of the cursor. When invoked with no
arguments, CURSOR turns on the cursor of the current
graphics terminal and then waits for the cursor to be positioned and a
key to be struck. MONGO then sets the current graphics location to the
position of the cursor. If CURSOR is given two arguments
they are taken to be user x,y coordinates and the cursor and the
current graphics location are moved to that position (i.e., a
RELOCATE is done). The cursor is not turned on, but will
be found at that location the next time it is turned on with a plain
CURSOR command.
The alert reader will have realized that hardcopy devices do not have cursors and so a command sequence that includes use of a cursor might not work on a hardcopy device. See the section on Advanced Commands to see how MONGO avoids this.
The POLY n p err command fits and plots
a polynomial to visible data points. It has one required argument,
n, which specifies the order of the polynomial to be used
for the fit. Only data within the current region is used to calculate
the coefficients. The results are stored in user variables:
| User variable | Value |
|---|---|
| \10 | RMS of the fit |
| \11 | order of the polynomial |
| \12-\19 | coefficients, constant first |
If n is -1 no new fit will be generated but, if
requested, the plot will be generated and/or the coefficients will be
printed using the coefficients stored in \12-\19. The
largest value of n permitted is 8. Two optional
parameters can also be specified. The first, p, tells
MONGO whether to print the polynomial coefficients or to plot the
polynomial.
| p Value | Command |
|---|---|
| 0 or omitted | Neither plot nor print |
| 1 | Plot |
| 10 | |
| 11 (default) | Plot and print |
If the argument err is 1, the user variable array
e (read by ECOLUMN) will be used as errors
for a weighted fit. Typically, a larger error implies a datum with
less importance (or weight). But an error of 0 causes the point to be
ignored. If argument err is 0 or omitted, all data are
weighted equally.
Polynomial fits can produce unexpected results if not used carefully. If you have not had experience with polynomial fitting, read a few appropriate pages from a numerical methods text before dismissing this command. In general, you will get reasonable results if you obey these guidelines:
set x x - 5000.5
set x x / 20. Higher polynomial
orders require smaller ranges.
Although MONGO accurately fits polynomials by temporarily shifting the abscissa to the origin, MONGO reports the polynomial coefficients which correspond to your range of abscissa and calculates polynomial results using these. As a result, very large errors can be reported when the abscissa is far from the origin.
The following figure shows a sample plot produced by the commands discussed above. Several more examples are found in the Appendix.
MONGO maintains a command buffer in which it stores most of the
commands that it executes. The commands in this buffer can be
re-executed without having to retype them. Commands can be input from
a file, and the command buffer can be written to a file. The command
buffer never contains commands such as TERMINAL,
PRINTER, HARDCOPY, SHOW,
HELP, or any buffer related commands unless you
explicitly insert them. This is to allow you to use a different output
device if you execute the buffer commands again.
MONGO also has the ability to group a sequence of commands under a
single name: a macro. Macros are created with the DEFINE
command, they can be executed interactively or by another macro, and
arguments can be passed to the commands within a macro. There is one
predefined macro, BUFFER, which is the contents of the
command buffer.
PLAYBACK xxx will re-execute macro
xxx without storing the command in the command
buffer. PLAYBACK BUFFER or PLAYBACK
without an argument will re-execute the contents of the command
buffer. This is extremely useful when constructing a complicated
plot. Using this command you can create the plot on a graphics
terminal and then when the results are satisfactory, type
           * printer
           * playback
           * hardcopy
INPUT filespec will read lines from the specified
file and execute them as though you had typed
them. WRITE xxx filespec will write the macro
xxx to a file filespec (xxx can
be BUFFER to write the contents of the command
buffer). It is also possible to type
WRITE ALL filespec, and everything, macros and
commands, will be written to a file. These two commands are very
important if you are making complicated plots or many similar plots,
because you can save and restore macros and plotting sequences
easily. The editing routines provided by MONGO (INSERT
and DELETE) are primitive. Often the best way to make a
complicated plot is to work with MONGO, write the command buffer, use
a standard editor to remove from the resulting file the false starts
and mistakes, and INPUT the edited file. There is also no
reason not to write a number of commands to a file using an editor
directly (or even a program), and then execute them by entering MONGO
and reading the file.
WRITE can also be used to save arrays.
WRITE array filespec will write the values of
array array to a file filespec.
MONGO provides a few simple commands to edit the command
buffer. LIST xxx will list macro
xxx. As usual, if xxx is BUFFER
or not given, LIST will list the contents of the command
buffer. DELETE n1 n2 will delete commands
n1 through n2 from the command buffer. The
command numbers are those shown by LIST. If
n2 is not given, only command n1 will be
deleted, and if no argument is provided, the last command will be
deleted. INSERT n will go into "insert mode" and
display the prompt "I*". All commands typed will be
inserted into the command buffer starting just before command
n (or at the end if n is not given). In
order to end insert mode, type the command END (once out
of insert mode another END will terminate MONGO). These
commands will be inserted directly and not executed.
The major utility of INSERT and DELETE is
to clean up a few mistakes in a long plotting sequence before a
PLAYBACK. If there are major problems, or if you want to
save a plotting sequence, it is generally better to WRITE
the command buffer, edit the file, and then INPUT the
edited file.
DEFINE xxx will enter "define mode" and start
creating a macro xxx. If the name xxx will
cause ambiguity with previously defined commands or macros, MONGO will
write "Ambiguous name" and return to normal mode. Define mode displays
the prompt "D*" to distinguish it from normal mode, and it is ended
with the command END. Commands that are typed in define
mode are verified to be legal, but stored for later use and not
executed. Previously defined macros can be used within another macro
definition. Once a macro is defined, it is executed simply by typing
its name.
There are nine special arguments that can be used within the
definition of a macro: &1 - &9. When a
macro is executed, any arguments following the macro name in the
command line are assigned to the variables
&1 - &9 and are substituted in place of
these arguments when the commands making up the macro are executed.
The substitution works from the end of a line to the front, so that if
multiple "&" characters are encountered they are
filled in sequentially. Thus &&1 gets converted
to &(&1).
MONGO provides a way to modify the value of macro arguments with
the "#" symbol. During macro expansion,
"&#" gets converted to "&". This
permits SET to change the value of the macro arguments
within a macro, because the & substitution mechanism
only passes through a line once, and , for
example, will be processed to be &1 at execution
time.
DEFINE DECREMENT
SHOW &1 ! What did we start with for &1?
SET  &1 - 1 ! Decrement it
SHOW &1 ! What do we now have for &1?
END
Macro arguments are separated by spaces and can be any string of
characters or numbers; illegal arguments are detected when the
commands making up the macro are executed. Argument
&0 is also available to all macros. It contains the
number of arguments in the macro argument list.
           * define test
           D* data &1
           D* xcolumn 1
           D* ycolumn &2
           D* erase
           D* points
           D* end
	   * test file1.dat 2
           * test file2.dat 5
Macros can be defined by using INPUT to read a file of
commands, and they can be listed with LIST and saved with
WRITE.
RENAME xxx yyy changes the name of macro
xxx to yyy. It cannot be used with built-in
commands. This is of some use when you are working on developing a
macro and do not want to exit and reenter MONGO to try a new version.
Normally, users invoke an editor to develop a macro, and use the
mongo my_file command to ask MONGO to load macro
file, my_file, automatically. Users can also use the
command editing capability of MONGO to provide some level of input
history.
The IF command can be used for branching. The syntax
depends on the number of arguments present. With no arguments,
IF is a no-op and the next command is executed. With one
argument, IF a will execute the next command if
a is true, i.e. non-zero; otherwise the next command will
be skipped. With two arguments, IF a b will
execute the next command if a = b; otherwise
the next command will be skipped. IF can be used in
conjunction with BREAK and tail recursion to provide
looping.
The BREAK command will terminate execution of a macro
and pass to the next outermost macro, or the main interpreter if
execution is only one level deep. BREAK can be provided
with an argument, and BREAK n will ascend
n levels of macro. If n is less than zero,
BREAK -1 will return directly to the main
interpreter. Note that BREAK 1 is synonymous to
BREAK with no argument.
The EXECUTE command promotes its first argument to a
command when it is interpreted. However, in macro definition mode,
EXECUTE is saved as itself, and only at execution time
does it promote its arguments. Thus EXECUTE permits a
macro to execute its arguments.
Here is an example of a loop macro which is executed with the
syntax LOOP cmd n args. It will execute the command or
macro cmd index args a total of n times,
with the index index seen by cmd
decrementing each iteration from an initial value of n
down to 1. This is a simple macro without any test for a
negative count, but illustrates some of the power of the MONGO macro
substitution, branching, tail recursion, and EXECUTE
command.
DEFINE LOOP ! Args = Macro Count Arg1 Arg2 ...
IF &2 0 ! Test for Count < 1 (done yet?)
BREAK ! Quit
EXECUTE &1 &2 &3 &4 &5 ! Execute Macro with arguments
SET  &2 - 1 ! Decrement Count
LOOP &1 &2 &3 &4 &5 ! Tail recursion with decremented loop count
END
LOOP SHOW 7
Suppose you wanted to make a logarithmically spaced x axis which
only runs from 100 to 390, hence TICKSIZE -1 0 0 0 will
only show 3 ticks and labels. You might want to fill in the
intermediate ticks at every 10. You could do this with a slightly
different definition of LOOP whose first three arguments
are the starting index, the final index, and the increment. When the
macro is executed the first argument will become the running index.
DEFINE ILOOP ! ILOOP Macro Start End Increment Arg1 Arg2 ...
SET \0 &2 > &3 ! Set \0 to Index > End (NOTE: \0 used)
IF \0 ! Test for Index > End (done yet?)
BREAK ! Quit
EXECUTE &1 &2 &3 &4 &5 &6 ! Execute Macro, args: Index End Incr Arg1 ...
SET  &2 + &4 ! Increment Start
ILOOP &1 &2 &3 &4 &5 &6 ! Tail recursion with decremented loop count
END
Now the definition which will make the little ticks. Note the use
of PTYPE 2 0 which will make a vertical stroke
which scales with whatever the current expansion is and which is
clipped at the edge of the box. First the macro which does the
work...
          DEFINE LOGXAXIS           ! LOGAXIS Index End Increment
          SET \0 &1 LOG             ! Compute the log of the index
          RELOCATE \0 Y1            ! Relocate at the bottom of the box
          DOT                       ! Make a dot (vertical stroke since ANGLE = 90)
          RELOCATE \0 Y2            ! Relocate at the top of the box
          DOT                       ! Make a dot
          END
And finally the macro which calls ILOOP.
          DEFINE TENSTICK
          PTYPE 2 0                  ! Choose a two-sided polygon (i.e. stroke)
          ANGLE 90                   ! Rotated 90 deg to vertical
          SET EXPAND EXPAND * 2.5    ! Increase the expansion factor
          ILOOP LOGXAXIS 110 390  10 ! Draw at 10's with 2.5 expansion
          SET EXPAND EXPAND / 2.5    ! Restore the expansion
          SET EXPAND EXPAND * 4.0    ! Yet larger expansion factor
          ILOOP LOGXAXIS 150 350 100 ! Draw at 50's with 4 expansion
          SET EXPAND EXPAND / 4.0    ! Restore the expansion
          ANGLE 0                    ! Restore ANGLE
          END
This section describes the last of the commands that interactive MONGO recognizes, as well as some additional options of previously defined commands. These commands are more subtle than those of the previous sections, and it is assumed that the reader is familiar with the contents of these sections.
Generally, the arguments that one provides for MONGO commands are
literal numbers, but MONGO provides a facility by which symbolic
arguments can be used instead. When the argument list of a MONGO
command is parsed, certain names are recognized and numerical values
are substituted in their place. Users may not arbitrarily create these
symbolic names. However, MONGO provides a limited set of predefined
names for users. These names and their values (or intended use) are
as follows:
x0, y0 |
User coordinates of the current graphics location |
gx, gy |
Device coordinates of the current graphics location |
cx, cy |
User coordinates of the last cursor position |
x1, x2, y1, y2 |
User coordinates of the limits of the graphics area |
gx1, gx2, gy1, gy2 |
Device coordinates of the limits of the graphics area |
lx1, lx2, ly1, ly2 |
Device coordinates of the limits of the device |
expand |
Current expansion |
angle |
Current angle |
ltype |
Current line type |
lweight |
Current line weight |
numdev |
Current device number |
ptype |
Current point type |
line1, line2 |
Limits of lines to be read from a data file |
inmode |
Input processing flags |
color |
Current color |
fill |
Current fill style |
x(n) |
Current value of nth element in the X array* |
y(n) |
Current value of nth element in the Y array* |
u(n) |
Current value of nth element in the U array* |
v(n) |
Current value of nth element in the V array* |
e(n) |
Current value of nth element in the error bar array* |
p(n) |
Current value of nth element in the point type array* |
| All other single letters (denoted by ?(n)) |
Current value of nth element in the ? array* |
\0-\99 |
Current value of the 100 user variables |
&0-&9 |
Ten macro arguments |
*The zeroth element of an array is the number of elements it contains.
The SET provides a mechanism for the user to assign
values to any of the symbolic variables. It also provides a way to
perform mathematical operations on the variables. The syntax for the
SET command is
SET a b (op (c))
SET will accept any of these symbolic variables as its
first argument and SET can take one, two or three
additional arguments. If only one additional argument is present,
SET var value sets var to
value where value can be a number or one of
the symbolic variables. If two additional arguments are present, the
first is either a symbolic variable or a number and the second is a
unary operator such as ABS (absolute value). If three
additional arguments are present the middle one is taken to be a
binary operator operator and the others are symbolic variables or
numbers. Then SET var x op y sets
var to x(op)y. The list of valid operators
and their meaning is shown in the table below.
MONGO SET Syntax
|
Meaning |
|---|---|
SET a b + c
|
A = B + C
|
SET a b - c
|
A = B - C
|
SET a b * c
|
A = B * C
|
SET a b / c
|
A = B / C
|
SET a b \ c
|
A = integer(B / C)
|
SET a b mod c
|
A = B - C * integer(B / C)
|
SET a b sqrt
|
A = sqrt(B) or -sqrt(-B) for B < 0
|
SET a b ln
|
A = ln(B) or -50 for B < 0
|
SET a b exp
|
A = exp(B) or 0 for B > 84
|
SET a b log
|
= log(B) or -50 for B > 0
|
SET a b dex
|
A = 10^(B) or 0 for B > 35
|
SET a b abs
|
A = absolute value of B
|
SET a b int
|
A = integer part of B
|
SET a b nint
|
A = nearest integer to B
|
SET a b max c
|
A = max(B, C)
|
SET a b min c
|
A = min(B, C)
|
SET a b poly
|
A = current polynomial evaluated at B
|
SET a n column
|
Fill A with the N-th column from the current data file
|
SET a n row
|
Fill A with the N-th row from the current data file
|
SET a b to c
|
Fill array A with integers from B to C
|
SET a b swap
|
Swap contents of A and B arrays
|
SET a b reverse
|
Fill A array with reversed B array
|
SET a b sum
|
Set A to the sum of the B array
|
SET a b sort
|
Fill A with the sorted B array
|
SET a b index
|
Fill A with the index of the B array when sorted
|
SET a n random
|
Fill A with N uniform variates between 0 and 1
|
SET a n grand
|
Fill A with N Gaussian variates of unity variance
|
SET a b hist c
|
Fill A with histogram of B values in C bins
|
SET a b if c
|
A = B if C .ne. 0
|
SET a b not
|
A = 1 if B = 0, else A = 0
|
SET a b > c
|
A = 1 if B > C, else 0
|
SET a b >= c
|
A = 1 if B >= C, else 0
|
SET a b < c
|
A = 1 if B < C, else 0
|
SET a b <= c
|
A = 1 if B <= C, else 0
|
SET a b = c
|
A = 1 if B = C, else 0
|
SET a b and c
|
A = 1 if (B .and. C), else 0
|
SET a b or c
|
A = 1 if (B .or. C), else 0
|
SET a p color
|
Fill A with the color field of the P array
|
SET a p expand
|
Fill A with the expand field of the P array
|
SET a p angle
|
Fill A with the angle field of the P array
|
SET a p nside
|
Fill A with the nside field of the P array
|
SET a p style
|
Fill A with the style field of the P array
|
The more subtle rules concerning variables and operators are usually intuitive but, for the sake of completeness, they will be mentioned here.
-gy1 to negate the quantity gy1.
In this case you would need to set one of the user variables to
gy1 and multiply it by -1 as in
SET x gy1 * -1.
u is
specified by u(5).
SET x(7) 4 makes the seventh element of
the x array 4. But SET x 4 makes
all the elements of the x array to the same value, 4.
SET a previously unfilled array with a
constant. MONGO will not know how many elements should be filled and
will complain about "Empty array". You first must to SET
the array to a previously filled array, read data from a file,
SET the 0th element of the array, or use one of the
operators such as TO or RANDOM which fill an
array explicitly. A subtle example of this is the command
SET u 1 - x where u is
presently unused. MONGO interprets this from left to right and cannot
derive a dimension for u from the constant
1.
p array
and the l array. The p array is an array of
integers. The p array is intended to contain codes
describing how a number of different points are to be constructed and
the codes are best described by integers. The l array is
an array of labels or strings. The l array is intended to
contain plottable labels.
\0 - \9 will be
interpreted within strings.
Judicious use of symbolic and user variables can achieve some very
useful results. For example, setting a user variable at the start of a
macro to the current angle means that the angle can be changed
arbitrarily within the macro (perhaps to draw points at a given
rotation), and then reset just before the end of the macro:
          * define diamond
          D* set \0 angle
          D* set \1 ptype
          D* angle 45
          D* ptype 40
          D* dot
          D* angle \0
          D* ptype \1
          D* end
Here is an example of how to divide the current graphics area into
two vertically contiguous panels in a device independent way:
          * limits 0 1 0 1
          * relocate 0 0.5
          * set \0 gy1
          * set \1 gy
          * set \2 gy2
          * location gx1 gx2 \0 \1   ! Lower panel
          * location gx1 gx2 \1 \2   ! Upper panel
          * location gx1 gx2 \0 \2   ! Whole area
Notice how relocate can be used as a means of translating user
coordinates to device coordinates. Alternatively, in this last example
SET could have been used to calculate \1 as:
          * set \1 gy2 - gy1
          * set \1 0.5 * \1
          * set \1 gy1 + \1
The point/label attribute array p is treated somewhat
differently from the other arrays, even apart from the fact that it is
integer storage. First, mention of the p array using
PCOLUMN or SET enables its use for drawing
points or labels; use of PTYPE disables it. Second, when
you SET various fields of the p array using
the attribute operators, they are or'ed with the existing fields.
Thus, you must zero the p array prior to adding
attributes unless you want to keep the previous contents. Here is an
example of how to plot a bunch of (x,y) points with the
even points being red and the odd points being blue.
          SET U 1 TO X(0)   ! Use U to select between even and odd
          SET P U * 0       ! Provide P array with a dimension and zero it
          SET U U MOD 2     ! U is now 0/1 for even/odd
          COLOR 2 1 0 0     ! Color 2 is red
          COLOR 3 0 0 1     ! Color 3 is blue
          COLOR 1           ! Return to color 1 as a default
          SET V U * 3       ! Odd elements of V are 3 (blue)
          SET U 1 - U       ! Even elements of U are 1
          SET U U * 2       ! Even elements of U are 2 (red)
          SET U U + V       ! Both color attributes combined
          SET P U COLOR     ! Put color into P array
          SET P 10 NSIDE    ! Ask for circles
          FILL 1            ! Ask for filled circles
          POINTS            ! Draw the points
          FILL 0            ! Finish the fill
The point/label attribute operators COLOR, EXPAND, ANGLE,
NSIDE, STYLE (not to be confused with the symbolic variables of
the same name) must have the p array as one of their
arguments and they pack or unpack the appropriate bit field into a
real number.
In addition to specifying the number of sides of a polygon point,
the nside operator accepts arguments of 0, which
indicates that the point should not be drawn, and -1 which means to
use the default point type defined by PTYPE.
SET a b index fills a with
the index of each entry in b according to where it would
fall if b were sorted. Thus, a is such that
b(a(1)) = smallest_b,
b(a(2)) = second_smallest_b
, etc. Note that although
array entries are not permissable as indices, an array can be filled
via a loop (as defined below in the discussion on macros):
          DEFINE ASORT
          SET \0 &1               ! Set \0 to index (forcing arg -> numeric conversion)
          SET \1 &4(\0)           ! Set \1 to contents of index array
          SET &2(\0) &3(\1)       ! Set Arg1(I) = Arg2(Arg3(I))
          END

          SET V X INDEX           ! Fill V array with index of X array
          LOOP ASORT V(0) Y U V   ! Fill Y array with sorted U array (via V)
This has the effect of filling y with the entries in
u according to the ordering in array x,
useful, for example, if x were data values, and
u were associated error bars. index permits
you to sort more than one array according to the order of one, or data
values sorted by some other criterion than their own values.
The operators random and grand can take
an optional second argument which is used as a seed for the random
number generator, thus SET x 100 random 19980525 would
fill the x array with 100 random numbers between 0.0 and
1.0, calculated from this initial seed.
Here are some examples of how these operators might be used.
           SET \0 X1        !Set the 0th user variable to the lower x plot limit
           SET X(3) \0 SQRT !Set the third entry of the X array to SQRT(\0).
           SET Y 100 RANDOM !Fill the Y array with 100 random numbers between 0 and 1.
           SET U X(0) GRAND !Fill the U array with as many Gaussian distributed
                            !random numbers as there are entries in the X array
           SET \0 \1 POLY   !Set user variable \0 to the current polynomial
                            !evaluated at point \1.
           SET X() Y SWAP   !Swap the X and Y arrays.
           SET V V REVERSE  !Reverse the order of the V array.
           SET X U SORT     !Fill the X array with the sorted U array.
           SET U U INDEX    !Fill the U array with the index of the sorted U
                            !array.  U(1) is now its rank in the sorted array.
           SET X 1 TO 100   !Fills the X array with the numbers 1 to 100.
           SET Y U HIST X   !Fill Y with a histogram of the counts in array U.
                            !according to the bin centers in array X.
           SET Y P COLOR    !Fill Y with the color field of the P array.
           SET P U EXPAND   !Set the expansion field of the P array from array U.
           SET Y U IF V     !Fill Y with U for each non-zero entry of V.
Here is a simple example of how you could adjust the graphics location to have the same form factor as the limits on the axes.
           DEFINE PROPLOC
           SET \0 GX2 - GX1    ! \0 is the x range (device coords)
           SET \1 GY2 - GY1    ! \1 is the y range (device coords)
           SET \2  X2 -  X1    ! \2 is the x range (user coords)
           SET \3  Y2 -  Y1    ! \3 is the y range (user coords)
           SET \0 \0 / \2      ! \0 is the x ratio of device to user
           SET \1 \1 / \3      ! \1 is the y ratio of device to user
           SET \0 \0 MIN \1    ! \0 is the minimum of ratios (so it will fit)
           SET GX2 \2 * \0     ! GX2 is the x range in device coords
           SET GX2 GX2 + GX1   ! GX2 is now the upper x limit in device coords
           SET GY2 \3 * \0     ! GY2 is the y range in device coords
           SET GY2 GY2 + GY1   ! GY2 is now the upper y limit in device coords
           END
Here's a more complicated example which plots a Gaussian.
           SET X -50 TO 50     ! Fill X array with 101 numbers from -50 to 50
           SET X X * 0.1       ! Convert it to -5.0 to +5.0 with steps of 0.1
           SET Y 10000 GRAND   ! Fill the Y array with 10000 Gaussian random numbers
           SET Y Y HIST X      ! Convert the Y array to a histogram
           LIMITS -5 5 0 500   ! Define some limits...
           BOX                 ! Draw a box...
           HISTOGRAM           !   and plot the histogram
           SET Y X * X         ! Now start a smooth curve with Y = X^2
           SET Y Y * -0.5      !  ... times -0.5
           SET Y Y EXP         !  ... exponentiated: Y = exp(-0.5 X^2)
           SET Y Y / 2.5066    ! Normalize by sqrt(2 pi)
           SET Y Y * 10000     !  ... and the number of trials
           SET Y Y * 0.1       !  ... and the bin size
           CONNECT             ! Draw the curve
And finally a simple example, showing how you can convert a bunch of numbers to a cumulative distribution.
           SET Y 100 GRAND   ! Fill the Y array with 100 Gaussian random numbers
           SET X Y SORT      ! Sort Y into the X array
           SET Y Y INDEX     ! Convert the Y array to the index
           SET Y Y / Y(0)    ! Normalize to unity
           LIMITS -3 3 0 1   ! Limits...
           BOX               !   and a box
           HISTOGRAM         ! Draw the curve
It may seem awkward using this SET command since it can only perform one operation at a time. Remember, however, that macro arguments are carried symbolically until execution time so that you can easily create more complex mathematical functions. For example, you could define a macro to perform an inverse hyperbolic cosine on an array, acosh(x) = alog(x+sqrt(x^2-1)), as
           DEFINE ACOSH     ! Args = array to be converted
           SET A &1         ! Save a copy of argument array in the A array
           SET &1 &1 * &1   ! Square it
           SET &1 &1 - 1    ! Subtract 1
           SET &1 &1 SQRT   ! Square root
           SET &1 &1 + A    ! Add to original array
           SET &1 &1 LN     ! Natural log
           END
AXIS is a routine that can be complicated to use, but
it is included as a user command because there are times when nothing
else will do. AXIS takes 10 arguments:
AXIS a1 a2 small big xa ya xb yb ilsbel iclock.
The meaning of the arguments is as follows: the axis starts at
location (xa, ya) and stretches to location (xb,
yb). These coordinates are device coordinates, not user
coordinates. It is labeled from a1 to a2
(these are ordinarily provided by LIMITS). The meaning
of small and big is the same as in
TICKSIZE. If big > 0,
AXIS will use big for spacing of large ticks
and if small > 0 it will try to use
small for the spacing of small ticks. If
small < 0, AXIS will make a
logarithmic axis, if small = 0 it will use its
default. label has a number of label options encoded in
a single number. The sign, one's, ten's, and hundred's place all
affect the way that a label is drawn. The sign controls whether a
ticks (as opposed to labels) are drawn; the one's digit selects the
orientation (and presence) of labels; the ten's digit determines the
font used; and the hundred's digit decides the format used for writing
the labels. The possibilities are:
| Sign (ticks) |
Hundred's (format) |
Ten's (font) |
One's (orientation) |
|---|---|---|---|
| + ticks | 0 default | 0 Roman | 0 no labels |
| - no ticks | 1 0.0 format | 1 Plain | 1 parallel |
| 2 deg-min-sec | 2 Tiny | 2 perpendicular | |
| 3 hour-min-sec | 3 no labels |
Thus, for example, if ilabel = 111, MONGO
will draw an axis with the labels parallel to the axis, in the plain
font, in a "0.0" format (i.e. no bare decimal points).
iclock is 1 for clockwise ticks on the axis, and is 0 for
counter-clockwise.
AXIS can be used with appropriate arguments in the two
subareas in the previous example to make appropriately split axes and
a dividing line without ticks.
           * location gx1 gx2 \0 \1               ! Lower area
           * axis x1 x2 0 0 gx1 gy1 gx2 gy1 1 0
           * axis y1 y2 0 0 gx1 gy1 gx1 gy2 2 1
           * axis y1 y2 0 0 gx2 gy1 gx2 gy2 0 0
           * relocate x1 y2
           * draw x2 y2
           * location gx1 gx2 \1 \2               ! Upper area
           * axis x1 x2 0 0 gx1 gy2 gx2 gy2 0 1
           * axis y1 y2 0 0 gx1 gy1 gx1 gy2 2 1
           * axis y1 y2 0 0 gx2 gy1 gx2 gy2 0 0
As another example, a macro "abox" could be defined as
           * define abox
           D* axis y1 y2 0 0 gx1 gy1 gx1 gy2 0&2 1
           D* axis y1 y2 0 0 gx2 gy1 gx2 gy2 0 0
           D* axis x1 x2 0 0 gx1 gy1 gx2 gy1 0&1 0
           D* axis x1 x2 0 0 gx1 gy2 gx2 gy2 0 1
           D* end
This macro will perform the same function as BOX,
except that its default action with no arguments is to make no labels,
and it will not obey the TICKSIZE command. Notice how the
arguments &1 and &2 are preceeded by
0 so that AXIS will have all the necessary arguments even
when &1 or &2 are null.
BOX can be used with two arguments:
BOX labelx labely. These govern the
orientation of the tick labels on the x and y axes respectively. See
the description of AXIS for all the options. Some
possibilities are:
BOX used without any arguments is equivalent to
BOX 1 2.
The command DEVICE n is similar to
TERMINAL and PRINTER. When
n > 0, MONGO selects terminal
n, and when n < 0, MONGO
selects printer -n. The difference arises when a printer
is selected because MONGO does not reinitialize the plot. Thus
DEVICE is not suitable for selecting a printer in the
first place, but can be used to continue output to a printer without
losing the previous output. If, for example, some output is sent to a
printer, and then a terminal is selected for output, output can be
resumed to the printer using DEVICE, whereas
PRINTER would discard the previous output to the printer.
If HISTOGRAM is followed by an argument the histogram
that is drawn has 45 degree hatching of the area between it and a
horizontal line. The absolute value of the argument specifies the y
coordinate of this line (in device coordinates). If the argument is
positive the lines are drawn at +45 degrees, and if the argument is
negative the lines are drawn at -45 degrees. The spacing between the
lines is expand * lx2 / 100 in device
coordinates, so that the spacing can be varied by using the
EXPAND command. The command HISTOGRAM
without an argument is equivalent to HISTOGRAM gy1.
There are occasions when you need to align a label with a feature
of a plot rather than at an absolute angle. In order to accomplish
this, give the ANGLE command four arguments consisting of
the user coordinates of two (x,y) pairs:
ANGLE xa ya xb yb. The plotting
angle will then be adjusted to be parallel to the line connecting
these points.
As discussed before, CURSOR can be invoked with zero
or two arguments. The result of no argument is to turn on the cursor,
wait for it to be positioned, and then read the current cursor
location. When two arguments are present, they are taken to be
(x,y) in user coordinates and the cursor is set to that
position, but never turned on. In both cases, MONGO sets the current
graphics location to that point and sets the symbolic variables
cx and cy to the user coordinates of that
point (the device coordinates are temporarily available as
gx and gy).
There is a potential difficulty when a CURSOR command
is used on a terminal that actually has a cursor because it cannot be
"played back" on a hardcopy device which does not have a cursor. To
circumvent this problem, MONGO saves in its buffer the
CURSOR command with its arguments appended. Thus
if the user types CURSOR 3.5 7.9, that is
exactly what is saved in the buffer. If, however, the user types
CURSOR and then moves the cursor to location (2.3,9.5),
MONGO will save CURSOR 2.3 9.5 in the
buffer. Notice that this can now be played back on any device because
a printer can have a ficticious cursor that can be positioned although
it can never be read. (CURSOR is essentially equivalent
to RELOCATE for a printer.) This will also have the
effect that when the buffer is played back, MONGO will never pause to
read a cursor (unless a CURSOR command is inserted
directly with INSERT).
A further problem arises when CURSOR is invoked from
an input file of commands or from a macro. In the first case there is
no help; each time the file is input (which occurs each time the
buffer is played back), any CURSOR commands without
arguments will expect to turn on a cursor and read its position. In
the case of a CURSOR command in a macro, however, MONGO
offers a solution. When a CURSOR command occurs in a
top level (not nested) macro, its arguments (which are
explicitly provided by the user or else provided by MONGO after the
user positions the cursor) are appended to the argument list of the
macro when its invocation is saved in the buffer. Thus, for
example,
           * define ylevel
           D* cursor &1 &2
           D* set \0 cy
           D* label (y = \0)
           D* end
           *
y value of the cursor. When the macro is
invoked the arguments &1 and &2 are
null, so that MONGO turns on the cursor and waits for it to be
positioned (say to 2.3, 9.5) before continuing. What MONGO will save
in the buffer, however, is ylevel 2.3 9.5. If
the buffer is played back or saved, the cursor command in
ylevel is provided with arguments, will not wait for any
cursor, and will work on printers. It is the user's responsibility to
keep track of other macro arguments; the rule is that each
CURSOR command in a macro appends its (x,y)
arguments to the end of the list of macro arguments.
Three of these commands,CONTOUR, 3DPLOT,
and HALFTONE, are three dimensional in nature. That is,
the data array describing a three dimensional surface is a two
dimensional array where the data describe the z direction and the x
and y values are assumed from the indices of the data. MONGO's
interactive command language does not provide a way to read data of
this sort. However, the "interpreter" mode of MONGO provides a
mechanism for MONGO to access such data. Recall that the interpreter
mode can be used by calling MONGO as a subroutine.
CALL MONGO(N,COM,L,M,DATA)
DATA is a two dimensional array that can be used to
pass the data values to MONGO. The integer L is the
number of rows and M and is the number of columns in the
array DATA. All three of these routines expect the three
dimensional surface data to be made available in the DATA
array.
CONTOUR will make a contour plot of an array of data
that has been passed to MONGO when it is called as a subroutine from a
FORTRAN program (i.e., "interpreter mode"). This plot will fill the
current graphics area (set by LOCATION).
CONTOUR takes a variable number of arguments
corresponding to the levels that are to be plotted. The first
argument is the number of succeeding arguments, each of which is a
level at which a contour line should appear: CONTOUR
N Z1 Z2 ... ZN. There is no facility for
labeling different contours or for "valleys" to be marked differently
from "hills," although you can make contours of different line type or
weight by using LTYPE and LWEIGHT and
re-executing CONTOUR with the appropriate contour levels.
3DPLOT makes a three-dimensional plot (grid of lines
with vertices at heights z(x,y), viewed from an arbitrary angle and
projected). It uses an array of data passed to MONGO when it is called
as a subroutine ("interpreter mode"). The arguments required by
3DPLOT are ALT, AZ, and
ZMAX, with the meaning that the raised grid is viewed
from altitude ALT and azimuth AZ, and scaled
so that z value ZMAX roughly fills the vertical scale.
The plot that appears is roughly the size of and centered in the
current graphics area (set by LOCATION).
ALT is the angle of the viewer above the plane of the
plot; ALT = 0 is edge-on and
ALT = 90 corresponds to a view from overhead
(revealing just a uniform checkerboard). AZ is the
azimuthal viewing angle, measured clockwise in degrees. Thus
AZ = 0 for the x axis to be horizontally at the
lower part of the plot, AZ = 90 for the y axis
to be horizontally at the lower part of the plot, etc. Note that there
should be at least several device pixels per grid step in order that
the plot not be hopelessly confused, so it may be necessary to
compress a data array to a smaller one if the size of the data array
is comparable to the number of pixels allowed by the plotting device.
HALFTONE makes a halftone (grayscale) picture of data
passed to MONGO when it is called as a subroutine ("interpreter
mode"). The plot will fill the current graphics
area. HALFTONE can take either two or four arguments,
which govern the way that the various data levels are represented as
gray levels. If there are two arguments,
HALFTONE Z1 Z2 will draw data values of
Z1 at the background gray level, Z2 at the
"highlight" gray level, and intermediate values at intermediate gray
levels. In this case HALFTONE makes a linear mapping of
data levels to gray levels. If four arguments are present
HALFTONE Z1 Z2 CONTRAST ALGORITHM
will compute an enhanced mapping of data values to gray levels. In
this case Z1 and Z2 should span the entire
range of data levels present, and the argument CONTRAST
governs how dark or light the resulting picture will be. If
CONTRAST is 0, HALFTONE will use a monotonic
mapping such that there are equal number of pixels at each gray
level. If CONTRAST is positive, HALFTONE
will distort this mapping to enhance the number of background pixels
(reduce the numbers of highlight pixels), and if CONTRAST
is negative HALFTONE will enhance the number of highlight
pixels. Values of CONTRAST from roughly -5 to +5 will
make gross changes in the appearance of a picture.
ALGORITHM = 0 produces a very smooth image that
is quite computer intensive to make.
ALGORITHM = 1 produces a faster but grainer
image.
Different devices will have different representations of
"background" and "highlight." A terminal will have dark background and
a light highlight, whereas a printer will have white paper for its
background and dark highlights (generally preferred). If a picture is
desired that has the opposite sense of dark and light, simply reverse
the order of Z1 and Z2, i.e. make
Z1 > Z2. It is also important to bear in
mind that the picture will fill the graphics area, so that if square
pixels are desired, the size of the current graphics area must be
adjusted to be a fixed multiple of the dimensions of the picture. The
PROPORTION command will automatically adjust scaling to
make it isotropic.
VFIELD draws a vector field as a number of arrows.
The command is invoked with
VFIELD mode scale. It has three modes.
mode = 0: The data specifying the tails of
the arrows are taken from user variables X and
Y. User variable U gives the lengths of the
arrows and user variable V specifies the direction in
degrees counter-clockwise from pointing right.
mode = 1: The X and
Y user variables again specify the tails of the
arrows. The U and V user variables are
interpreted as Cartesian offsets to the heads of the arrows. That is,
for arrow number 6, the tail is specified by
(X6,Y6) and the head is specified
by (U6,V6).
mode = 2: In this mode the arguments have
the same meaning as mode = 1 but line segments
are drawn instead of arrows. The scaling parameter not used in this
mode.
When scale is omitted or zero, the lengths of the
arrows are scaled to a reasonable default size. Otherwise, the arrows
are scaled so that a arrow of length one is drawn with a length
scale on the x-axis. (The y-axis scaling is not
considered.)
If all arguments are omitted, VSCALE defaults to mode
0. If you wish to scale the arrows in mode 0, you cannot omit the
mode indicator. EXPAND will alter the scaled or default
lengths of the arrows in mode 0 and 1. Mode 2 line segments are not
scaled and ignore both scale and EXPAND
values.
By default, data from a file is read as tokens separated by whitespace (spaces or tabs). This style of reading allows users considerable freedom in defining the format of a data file. For example, lines that begin with an exclamation point (!) can be treated as comments and data between quotation marks ("") can be treated as strings. Quoted strings ("xxx yyy") can be treated as one token even if they include spaces.
MONGO uses the variable INMODE which to control input
parsing. The low order three digits of INMODE each
control an aspect of the parsing behavior. The one's digit controls
whether a comma appearing in an input string (or data) is treated as
whitespace, i.e. a token separator. The ten's digit specifies whether
a token beginning with an exclamation point (e.g. "!end" or "!") acts
as a line terminator (and the possible start of a comment). The
hundred's digit causes MONGO to treat double quotes as the start and
end of a quoted string, in which white space is kept as part of a
single token. The default value for INMODE is 111. That
is, commas are token separators as are spaces and tabs, exclamation
points begin comments and double quotes delimit strings. The following
table shows all the INMODE options:
| INMODE Digit | 1 | 0 |
|---|---|---|
| 1's | Comma is whitespace | Comma is comma |
| 10's | Exclamation point begins comment | exclamation point is
Exclamation point |
| 100's | Quotation marks delimit strings | Quotation marks are quotation marks |
Older versions of MONGO used a "list-directed" FORTRAN read to
fetch data. This is a very forgiving format as far as number format
and spacing is concerned, but is incapable of reading character data
without error unless it is enclosed in quotes. In order to overcome
some of the limitations of "list-directed" reads, MONGO supplies a
FORMAT command. Both "list-directed" reads and
FORMAT commands are still supported and may prove useful
for some special cases. You may request "list-directed" reads via the
FORMAT command without any
arguments. FORMAT FREE will return you to the
token-oriented separation of columns.
The FORMAT format command allows the user to
specify a FORTRAN format to be used in reading his data. The
format must be enclosed in parentheses, and can include
any format items that FORTRAN recognizes. The command
X(Y,E,P,U,V)COLUMN n will then read N
items from each line in the data file according to the format given,
and assign the nth to the variables in the
x(y,e,p,u,v) array. Note that all items read are
floating point, so all format specifications must reflect this. For
example, if the data looks like
Junk for 17 chars 2048 3.14159 2.71828
* format (17X,F10.0,F10.5,G10.0)
Note how the G format can be very useful in this case.
Used without an argument, FORMAT resets the data reading
format to list-directed format.
X(Y,E,P,U,V)COLUMN has two other modes of operation
when n is an illegal column number. If
n = 0, MONGO will read the data file between
line1 and line2 and write it to the
terminal. This can be useful to examine a data file without leaving
MONGO. If n < 0 MONGO will fill the first
-n elements of the appropriate array with the index
i, 1 < i < -n.
When you have a series of data in a file without an abscissa to plot
it against, this can provide one. For example, if you have a file with
one column consisting of 100 random numbers, you could plot them
with
         * xcolumn -100
         * ycolumn 1
         * points
If the DATA command receives the keyword
stdin as its argument, it will interpret that to mean
that data is to be read from the terminal until a line beginning with
enddata is encountered. Each line of input is saved in a
scratch file and the resulting file is then read by
XCOLUMN in the usual way, with different columns of
numbers read as sequences of data. This can occasionally be handy for
entering data by hand, but it is mainly intended for UNIX systems
where data can be piped directly to the process running MONGO without
going through the intermediary of a file. Beware of using this feature
when you do not have write permission to the current default
directory; MONGO will not be able to write this scratch file.
END, MONGO terminates;
if not, MONGO displays a prompt and waits for more command lines to be
typed. This is identical to entering MONGO, typing
INPUT file and then END (if the last
line of file is END).
MONGO can be called as an interactive program from another routine.
In this "interpreter mode", commands can be passed via a character
array and they will be processed exactly as though they were
interactive commands. If the final entry in the character array is
END, MONGO will return immediately to the calling
program. If not, the user will be left in interactive MONGO, a prompt
will appear, and the user can type interactive commands. Control will
not be returned to the calling program until the user explicitly exits
from MONGO with the command END.
MONGO is called as follows
           CALL MONGO(N,COM,L,M,DATA)
           INTEGER N            Number of commands in command array
           CHARACTER*(*) C(N)   Array of interactive commands
           INTEGER L            Number of "rows" in data array
           INTEGER M            Number of "columns" in data array
           REAL DATA(L,M)       Data array passed to MONGO
The one difference that interactive MONGO has when called from a
subroutine is that an array of data DATA can be passed as
an argument along with its dimensions. The commands
XCOLUMN and YCOLUMN refer to this array in
the same way that they would refer to data actually stored in a
file. There is no need to use the DATA command to open a
data file in this case. If the DATA command is used to
read data from a real file in the course of using the subroutine,
MONGO can be directed to use the passed data array again by using the
command DATA without an argument.
The first data index ranges over different data points and the
second over different data arrays, so that, for example,
XCOLUMN 2 will use DATA(i,2). The
dimension L must be the actual declared dimension of the
array, and MONGO will ordinarily expect that many points to plot. If
the array is not full, the command LINES must be used to
plot only part of it.
MONGO will return an altered array of commands. Its normal action
is to change a command line to one consisting of the command verb (put
in lower case with abbreviations expanded), one space, and then the
rest of the line (which begins at the first non-space). There are two
cases where MONGO behaves differently. First, when a user variable
(\0-\9) occurs in a label, it is replaced by its current
value and the command line returned reflects this. Secondly, when a
CURSOR command without arguments is executed, it writes
the resulting cursor position to the command line which is then
returned to the calling program. The cursor coordinates can be read
from the command line using the format (7X,2G12.4). A
CURSOR command executed within a macro also writes its
arguments to the command line that executed the macro, but in this
case the arguments are in a packed, irregular format.
MONGO will maintain its internal variables and buffer of
interactive commands in the usual FORTRAN fashion. Thus if MONGO is
called as a subroutine and control is returned to the calling program
with an END command, MONGO can be re-entered and plotting
resumed without any change (except insofar as the arguments to the
MONGO subroutine dictate).
This chapter describes the subroutines that comprise the MONGO subroutine library. The direct use of these subroutines is logically distinct from their use via the interactive interpreter and so much of the description of the previous chapter is repeated here. This chapter should stand alone as a MONGO library reference.
This section first presents a general description of how MONGO operates. Next, the logical assignments that are necessary in order to run MONGO are given. Finally, there is a discussion of the unit numbers that are used by MONGO and the central common block that contains key plot parameters.
Subsequent sections give detailed descriptions of all the useful subroutines in the object library. These descriptions are grouped by function.
MONGO is capable of directing output to a number of different plotting devices, but it sends output to only one device at a time. When a given device is selected, there is some range of legitimate plotting coordinates that the device will accept. These are referred to as the "device coordinates."
Within this area MONGO defines a primary location where things are plotted, and calls this the "graphics area" or "graphics region". This area can be the entire area allowed by the device, but in general is smaller to allow margins around the edges for labels. MONGO allows the graphics area to be a rectangle of any size and location (these are defined by specifying the location of the lower left and upper right corner in device coordinates).
Associated with the graphics area are "user coordinates" which are
user-defined coordinates of the lower left and upper right corner of
the graphics area. Most plotting locations are computed with reference
to these coordinates. For example, if the graphics area is defined to
have user coordinates (0,0) and (1,1), the
location (0.5,0.5) will be the center of the graphics
area, no matter what the device or location of the graphics region.
The user usually does not have to manipulate the device coordinates, or even be aware of them. MONGO provides reasonable defaults for the location of the graphics region every time a device is selected for output. By specifying user coordinates and using the routines that plot with respect to these, essentially the same plot will appear regardless of which device has been selected.
MONGO is intended to be a hierarchy of subroutines, each level a
little more powerful (but a little less flexible) than the previous
one. Essentially all levels are accessible so practically any plotting
function can be performed. Complicated and extensive argument lists
are avoided whenever possible; consequently, it is sometimes necessary
to call several routines in order to achieve a given result (e.g.,
MGORELOCATE and MGODRAW to make a line
segment, and MGOSETUP and MGOPRNTINIT in
order to start a plot on a hardcopy device). In general, MONGO
subroutine names are prefixed with the three characters
"MGO", in order to avoid conflicts with user supplied
subroutines (they are indexed both with and without the
"MGO" prefix for the sake of clarity). There is a file
which can be linked with the subroutine library that provides
subroutine names without "MGO" for compatibility with
MONGO 1983; see the Appendix for details.
There is one environment or logical assignment that may need to be made in order to use MONGO (if the default that MONGO has been installed with is not appropriate). The assignments for a UNIX system are quite different from those on a VMS system, so they will be treated individually.
If MONGO has been installed in a directory "[MONGO]"
the following assignment should be made:
$ ASSIGN [MONGO]MONGOFILES.DAT MONGOFILES
The file "mongofiles.dat" has four lines that tell
MONGO where to find font, help, hardcopy files, and what defaults to
use for terminal and printer. See the appendix for details on the
contents of this file.
If you would like to specify a default terminal, use the logical
name MONGOTERM. (SHOW TERMINAL will tell you
the device name associated with a particular device). Note that this
only allows you to specify a default terminal device and not a default
terminal type. The file "mongofiles.dat" must be used to
set the default terminal type.
$ ASSIGN TTA0: MONGOTERM
If you would like the command "mongo" to run mongo, define the
symbol
$ MONGO :== RUN [MONGO]MONGO
In order to link a program TEST.OBJ to the MONGO
object library use the command:
$ LINK TEST,[MONGO]MONGO/LIB
Suppose MONGO has been installed in the /u1/bin
directory, its library has been put in /u1/lib, and its
sundry files have been put in /u1/lib/mongo. In this
case the following assignment should be made:
$ setenv MONGOFILES /u1/lib/mongo/mongofiles.dat
The file "mongofiles.dat" has four lines that tell
MONGO where to find font, help, hardcopy files, and what defaults to
use for terminal and printer. See the appendix for details on the
contents of this file.
If you would like to specify a default terminal, use the
environment variable MONGOTERM. The UNIX command
"tty" will tell you what device name is associated with a
particular device. (See below for Suntools, however.) Note that this
only allows you to specify a default terminal device and not a default
terminal type. The file "mongofiles.dat" must be used to
set the default terminal type.
$ setenv MONGOTERM /dev/ttyp0
If you would like the command "mongo" to run mongo,
use the alias
$ alias mongo /u1/bin/mongo
or put /u1/bin in your search path.
In order to link a program test.o to the MONGO object
library, use the command
$ f77 test.o -lmongo
If you are using the Suntools environment, MONGO can be directed to
take over any window (e.g., /dev/win6) using
* terminal 6 /dev/win6
Notice that MONGO has to be given the window identity
of a Sun window rather than the terminal identity used above. The
window (as opposed to the terminal) identity of a window can be
uncovered using "printenv WINDOW_ME". Alternatively,
this window could have been selected by default by using
$ setenv WINDOW_GFX /dev/win6
MONGOTERM. In order to link a
program to MONGO and Suntools, use
$ f77 test.o -lmongo -lsuntool -lsunwindow -lpixrect
The unit numbers used by MONGO are listed below:
| Unit | Function |
|---|---|
| 0 | Error output |
| 5 | Interactive input |
| 6 | Interactive output |
| 7 | Plotting output to printer |
| 8 | Input of help, fonts, hardcopy commands, output of macro write |
| 9 | Plotting output to terminal |
| 10 | Input of data |
| 11-17 | Input of commands from a file |
Note that not all of these units will necessarily be used; for example, units 5 and 6 will not be used if the interactive interpreter is never used. The user should avoid conflicts with these unit numbers. This is usually easy to do; if a plotting session is entirely in interactive mode, MONGO can use many unit numbers, while the user is not likely to need many of them.
The basic MONGO common block is included in almost all of the MONGO
subroutines. This common block has the form:
          common /MONGOPAR/
         1 x1,x2,y1,y2, gx1,gx2,gy1,gy2,lx1,lx2,ly1,ly2,
         1 gx,gy, cx,cy,
         1 expand,angle, ltype,lweight,
         1 cheight,cwidth,cxdef,cydef,pxdef,pydef,coff,
         1 termout,xyswapped,numdev,
         1 pi, uservar, autodot
Although it is possible for the user to include the
MONGOPAR common block in any of his routines, it should
seldom, if ever, be necessary to do so. All important parameters in
the common block can be modified using MONGO subroutines explicitly
designed to modify them. It is also a bad programming practice to
directly modify the parameters because future version of MONGO may
change the internal name of the parameter or change the structure of
the common block. Then the user's code will no longer work. By
changing these parameters only through the appropriate subroutine, the
user can be guaranteed that his code will work as expected through any
future release of MONGO.
If you include the common block, be careful not to use the
variables by accident. The variables have the following
meanings:
| Name | Value |
|---|---|
x1,x2,y1,y2 |
User coordinates of plot region |
gx1,gx2,gy1,gy2 |
Physical coordinates of user plot region,gx1<gx2, gy1<gy2 |
lx1,lx2,ly1,ly2 |
Limit physical coordinates of device |
gx,gy |
Present plot position (physical coordinates) |
cx,cy |
Present cursor position (user coordinates) |
expand |
Expansion factor of characters |
angle |
Rotation of characters and points (counterclockwise) |
lweight |
Line weight: 1 for single, 2 for double, etc. |
ltype |
Type of output lines (see MGOSETLTYPE) |
cheight |
Expand 1.0 height of characters (physical units) |
cwidth |
Expand 1.0 width of characters (physical units) |
cxdef,cydef |
Expand 1.0 expansion of characters drawn by vector(x,y dir) |
pxdef,pydef |
Expand 1.0 radius of points, (x,y dir) |
coff |
Terminal vertical offset of characters (device coords) |
termout |
True for a terminal, false for printer |
xyswapped |
True for hardcopy landscape orientation |
numdev |
device number |
uservar |
array of 10 real user variables |
autodot |
True for a device capable of generating dot/dashed lines |
          SUBROUTINE MONGO(N,C,L,M,DATA)

          INTEGER N           !Number of commands in command array
          CHARACTER*(*) C(N)  !Array of interactive commands
          INTEGER L           !Number of 'rows' in data array
          INTEGER M           !Number of 'columns' in data array
          REAL DATA(L,M)      !Data array passed to MONGO
MONGO can be called as an interactive program from another routine.
In this 'interpreter mode,' commands can be passed via a character
array and they will be processed exactly as though they were
interactive commands. If the final entry in the character array is
END, MONGO will return immediately to the calling
program. If not, the user will be left in interactive MONGO, a prompt
will appear, and the user can type interactive commands. Control will
not be returned to the calling program until the user explicitly exits
from MONGO with the command END.
The one difference that interactive MONGO has when called from a
subroutine is that an array of data DATA can be passed as
an argument along with its dimensions. The commands
XCOLUMN and YCOLUMN refer to this array in
the same way that they would refer to data actually stored in a
file. If the DATA command is used to read data from a
real file in the course of using the subroutine, MONGO can be directed
to use the passed data array again by using the command
DATA without an argument. Note that the dimension
L must be the actual declared dimension of the array. If
the array is not full, the command LINES must be used to
plot only part of it.
The MONGO subroutine is described in greater detail in the Advanced Commands section in Chapter 2.
SUBROUTINE MGOERASE()
MGOERASE erases the screen of the current graphics
terminal. If the current device is a hardcopy device, the plot is
re-initialized.
          SUBROUTINE MGOPOINTS(STYLE,NSTYLE,PX,PY,NXY)

          REAL STYLE(NSTYLE)   !Number of sides * 10 + point style
          INTEGER NSTYLE       !Number of point specifications (1 or NXY)
          REAL PX(NXY)         !Array of x values
          REAL PY(NXY)         !Array of y values
          INTEGER NXY          !Number of array values
MGOPOINTS makes a point of the current rotation and
expansion at each (x,y) user coordinate. The point style
is specified similarly to MGOPOINT, except that the array
STYLE has a coded point style that consists of the number
of sides of the n-gon times 10, plus the point style, plus an optional
expansion fraction (zero fraction means default
expansion). NSTYLE gives the number of elements in
STYLE and is either 1 for a single specification for all
points or NXY for individual specifications for each
point. For example, if STYLE = 103.5 and
NSTYLE = 1, all points will be drawn as filled
decagons of half the current expansion. Fractions of less than 0.01
are treated as null, so that the point is drawn at full size.
          SUBROUTINE MGOCONNECT(PX,PY,NXY)

          REAL PX(NXY)   !Array of x values
          REAL PY(NXY)   !Array of y values
          INTEGER NXY    !Number of array values
MOGCONNECT connects the user coordinates
(x,y) that are passed to it with straight line segments.
Use MGOSETLWEIGHT or MOGSETLTYPE if you want
different line weights or styles.
          SUBROUTINE MGOHISTOGRAM(PX,PY,NXY)

          REAL PX(NXY)   !Array of x values
          REAL PY(NXY)   !Array of y values
          INTEGER NXY    !Number of array values
MGOHISTOGRAM connects the user coordinates
(x,y) that are passed to it with a histogram (horizontal
segments through each point connected by vertical segments). Use
MGOSETLWEIGHT or MOGSETLTYPE if you want
different line weights or styles.
          SUBROUTINE MGOHATCH(PX,PY,NXY,IHIST)

          REAL PX(NXY)    !Array of x values
          REAL PY(NXY)    !Array of y values
          INTEGER NXY     !Number of array values
          INTEGER IHIST   !Device coords of y limit
MGOHATCH connects the user coordinates
(x,y) that are passed to it with a histogram (horizontal
segments through each point connected by vertical segments)
identically to MGOHISTOGRAM. In addition,
MGOHATCH hatches the area between the curve and a
horizontal line with device coordinate ABS(IHIST) with
lines spaced by EXPAND * LX2 / 100 in
device coordinates. If IHIST > 0, the hatch
lines are at +45 degrees; if IHIST < 0, the
hatch lines are at -45 degrees. Use MGOSETLWEIGHT or
MOGSETLTYPE if you want different line weights or styles.
          SUBROUTINE MGOERRORBAR(K,PX,PY,ERR,NXY)

          INTEGER K       !Direction of error flags (1 - 4)
          REAL PX(NXY)    !Array of x values
          REAL PY(NXY)    !Array of y values
          REAL ERR(NXY)   !Array of error values
          INTEGER NXY     !Number of array values
MGOERRORBAR draws errorbars at all the passed
(x,y) locations. The location of the error bars is
determined by the PX and PY arrays, and the
magnitude is ERR (all in user coordinates). If
K is 1, the error bars extend in the direction of the
positive x axis; 2 is for positive y axis, 3 for negative x axis, and
4 is for negative y axis. Thus to draw symmetrical vertical errorbars
on a set of points, use MGOERRORBAR(2,PX,PY,ERR,N) and
MGOERRORBAR(4,PX,PY,ERR,N) Note that the point routine is
used to make the cross bar on the error flags, so that if you don't
want a cross bar you avoid it by using MGOSETEXPAND(0.).
          SUBROUTINE MGOVFIELD(PX,PY,R,PHI,NXY)

          REAL PX(NXY)    !Array of x values
          REAL PY(NXY)    !Array of y values
          REAL R(NXY)     !Array of vector magnitudes
          REAL PHI(NXY)   !Array of vector directions (degrees)
          INTEGER NXY     !Number of array values
MGOVFIELD draws arrows at all (x,y) user
coordinates. The direction of the arrow is determined by
PHI and the length by R. Directions are
measured counter-clockwise in degrees from pointing right. The size
of the arrow is normalized to the average value of R
(AVE has length (gx2-gx1) / 30),
but can be varied linearly by changing the expansion parameter with
MGOSETEXPAND. Use MGOSETLWEIGHT or
MOGSETLTYPE to change the line weight or style.
          SUBROUTINE MGOCONTOUR(Z,M,N,ZLEVEL,L)

          REAL Z(M,N)      !Data array whose contours are plotted
          INTEGER M        !Dimension of z array
          INTEGER N        !Dimension of z array
          REAL ZLEVEL(L)   !Array of contour levels to plot
          INTEGER L        !Number of contour levels to plot
MGOCONTOUR will make a contour plot of the data array
Z which will fill the current graphics area (set by
MGOSETLOC). Contours will be plotted at the levels that
are passed in the array ZLEVEL. There is no facility for
labeling different contours or for 'valleys' to be marked differently
from 'hills,' although you can make contours of different line type by
using MOGSETLTYPE and re-executing
MGOCONTOUR with the appropriate ZLEVEL
array.
          SUBROUTINE MGOPLT3D(Z,M,N,WORK,ALT,AZ,ZFAC,ZOFF)

          REAL Z(M,N)    !Data array whose surface is plotted
          INTEGER M      !Dimension of Z array
          INTEGER N      !Dimension of Z array
          REAL WORK(1)   !Scratch array of length > 4*min(M,N)
          REAL ALT       !Altitude of line of sight (degrees)
          REAL AZ        !Azimuth of line of sight (degrees)
          REAL ZFAC      !Factor multiplying array values to yield O(1)
          REAL ZOFF      !Location of origin of z axis in data units
MGOPLT3D produces a plot which is a view of a rumpled
rectangular grid with M by N lines and
height proportional to the array Z. The plot that appears
is roughly the size of and centered in the current graphics area (set
by MGOSETLOC). The variable ZFAC controls
the scale of the height coordinate, multiplying height values and
producing heights relative to the size of the graphics area.
ZOFF is the offset in the z coordinate. It is such that
if z(M/2,N/2) = -ZOFF, that point of the plot
will be roughly in the center of the graphics area.
ALT and AZ determine the viewing
angle. ALT is the angle of the viewer above the plane of
the plot, ALT = 0 is edge-on, and
ALT = 90 corresponds to a view from overhead
(revealing just a uniform checkerboard). AZ is the
azimuthal viewing angle, measured clockwise in degrees. Thus
AZ = 0 for the x axis to be horizontally at the
lower part of the plot, AZ = 90 for the y axis
to be horizontally at the lower part of the plot, etc.
Suggested values for these variables might be:
           ZFAC = 1/DATAMAX
           ZOFF = 0
           ALT = 40
           AZ = 30
          SUBROUTINE MGOHALFTONE(Z,M,N,Z1,Z2,CONTRAST)

          REAL Z(M,N)     !Data array whose picture is displayed
          INTEGER M       !Dimension of Z array
          INTEGER N       !Dimension of Z array
          REAL Z1         !Data level corresponding to background
          REAL Z2         !Data level corresponding to highlight
          REAL CONTRAST   !Contrast adjustment
MGOHALFTONE makes a halftone (grayscale) picture of
data. The plot will fill the current graphics
area. MGOHALFTONE has two distinct methods of determining
the way that the various data levels are represented as gray
levels. If the parameter CONTRAST is greater than
1.0E6, MGOHALFTONE will draw Z1
at the background gray level, Z2 at the 'highlight' gray
level, and intermediate values at intermediate gray levels. In this
case MGOHALFTONE makes a linear mapping of data levels to
gray levels. If CONTRAST is less than 1.0E6,
(values of roughly -5 to +5 are useful), MGOHALFTONE will
compute an enhanced mapping of data values to gray levels. In this
case Z1 and Z2 should span the entire range
of data levels present, and the argument CONTRAST governs
how dark or light the resulting picture will be. If
CONTRAST is 0, MGOHALFTONE will use a
monotonic mapping such that there are equal number of pixels at each
gray level. If CONTRAST is positive,
MGOHALFTONE will distort this mapping to enhance the
number of background pixels (reduce the numbers of highlight pixels),
and if CONTRAST is negative MGOHALFTONE will
enhance the number of highlight pixels.
Different devices will have different representations of
'background' and 'highlight'. A terminal will have dark background and
a light highlight, whereas a printer will have white paper for its
background and dark highlights (generally preferred). If a picture is
desired that has the opposite sense of dark and light, simply reverse
the order of Z1 and Z2, i.e., make
Z1> Z2. It is also important to bear in
mind that the picture will fill the graphics area, so that if square
pixels are desired the size of the current graphics area must be
adjusted to be a fixed multiple of the dimensions of the picture.
          SUBROUTINE MGOBOX(LABELX,LABELY)

          INTEGER LABELX   !x axis label orientation
          INTEGER LABELY   !y axis label orientation
Once limits have been set for the graphics area (using
MGOSETLIM), the area can be enclosed in a coordinate box
by the command MGOBOX(LABELX,LABELY). This will put
ticks on the inside of the box and coordinates below and to the left
of the box. The size of the labels and ticks can be altered with the
MGOEXPAND subroutine, and the spacing of the ticks (and
logarithmic axes) can be specified by the MGOTICKSIZE
subroutine. The MGOGRID subroutine can be used to put a
grid on the box. LABELX and LABELY govern
the orientation of the tick labels on the x and y axes respectively.
See the description of AXIS for all the options. Some
possibilities are: 0 to prevent all labels, 1 to make labels parallel
to the axis, and 2 to make them perpendicular. [The command
BOX without any arguments is equivalent to
MGOBOX(1,2)].
          SUBROUTINE MGOXLABEL(N,S)

          INTEGER N         !Number of characters in S
          CHARACTER*(*) S   !Character string to be plotted under x axis
MGOXLABEL(N,S) will write the label S
centered under the lower side of a coordinate box made by
MGOBOX. See MGOLABEL for a description of
the form that the string can take.
          SUBROUTINE MGOYLABEL(N,S)

          INTEGER N         !Number of characters in S
          CHARACTER*(*) S   !Character string to be plotted left of y axis
MGOYLABEL(N,S) will write the label S
vertically, centered to the left of the left side of the coordinate
box made by MGOBOX. See MGOLABEL for a
description of the form that the string can take.
          SUBROUTINE MGOTICKSIZE(SX,BX,SY,BY)

          REAL SX   !Interval between small ticks on the x axis
          REAL BX   !Interval between big ticks on the x axis
          REAL SY   !Interval between small ticks on the y axis
          REAL BY   !Interval between big ticks on the y axis
MGOTICKSIZE(SX,BX,SY,BY) sets the tick intervals for
MGOBOX to other than the defaults. SX refers
to the interval between small tick marks on the x axis,
BX refers to the interval between large ticks (and
labels), and SY and BY control the y
axis. For example, if you use MGOSETLIM(0.,0.,60.,1.),
MONGO will ordinarily provide ticks on the x axis separated by
intervals of 2 and labels separated by 10. If you wanted intervals of
1 and 6, you could use MGOTICKSIZE(1.,6.,0.,0.). If
SX or SY is 0, the axis routine will supply
its own intervals on that axis according to the label limits. If
SX or SY < 0, the axis will
have logarithmic tick spacing with large ticks at each decade and
small ones at each integer. When SX or
SY < 0, MGOBOX assumes that the
limits are logarithms, e.g., -2 and 2 refer to limits of 0.01 and 100.
          SUBROUTINE MGOGRID(N)

          INTEGER N   !Frequency of grid lines
MGOGRID(N) will make a grid over a coordinate box. If
N = 0, it will put grid lines at every major
tick mark in the current line type, and if
N = 1, it will put grid lines at all tick
marks.
          SUBROUTINE MGOPLOTID(F1,F2)

          CHARACTER*(*) F1   !Name of input file
          CHARACTER*(*) F2   !Name of data file
MGOPLOTID is used to label a plot with the time and
date. It will write the string F1, the string
F2, the date, and the time just above the upper right
hand corner of the coordinate box. See MGOLABEL for a
description of the form that the strings can take.
          SUBROUTINE MGOAXIS(A1,A2,SMALL,BIG,AX1,AY1,AX2,AY2,ILABEL,ICLOCK)

          REAL A1          !Starting label of the axis
          REAL A2          !Ending label of the axis
          REAL SMALL       !Interval between small ticks on the axis
          REAL BIG         !Interval between big ticks on the axis
          REAL AX1         !x (device) coordinate of start of axis
          REAL AY1         !y (device) coordinate of start of axis
          REAL AX2         !x (device) coordinate of end of axis
          REAL AY2         !y (device) coordinate of end of axis
          INTEGER ILABEL   !Label orientation
          INTEGER ICLOCK   !Direction of ticks and labels
MGOAXIS is a routine that is complicated and can be
difficult to use. The meaning of the arguments is as follows: the
axis starts at location (AX1,AY1) and extends to location
(AX2,AY2). These coordinates are device
coordinates, not user coordinates. It is labeled from A1
to A2. The meaning of SMALL and
BIG is the same as in TICKSIZE. If
small < 0, MGOAXIS will make a
logarithmic axis, if SMALL = 0, it will use its
default. If BIG > 0, MGOAXIS
will use BIG for spacing of large ticks and if
SMALL > 0, it will try to use
SMALL for the spacing of small ticks.
ILABEL has a number of label options encoded in a single
number. The sign, one's, ten's, and hundred's place all affect the way
that a label is drawn. The sign controls whether ticks (as opposed to
labels) are drawn; the one's digit selects the orientation (and
presence) of labels; the ten's digit determines the font used; and the
hundred's digit decides the format used for writing the labels. The
possibilities are:
| Sign (ticks) |
Hundred's (format) |
Ten's (font) |
One's (orientation) |
|---|---|---|---|
| + ticks | 0 default | 0 Roman | 0 no labels |
| - no ticks | 1 0.0 format | 1 Plain | 1 parallel |
| 2 deg-min-sec | 2 Tiny | 2 perpendicular | |
| 3 hour-min-sec | 3 no labels |
Thus, for example, if ILABEL = 111, MONGO
will draw an axis with the labels parallel to the axis, in the plain
font, in a '0.0' format (i.e. no bare decimal points).
ICLOCK is 1 for clockwise ticks on the axis, and is 0 for
counter-clockwise.
          SUBROUTINE MGOLABEL(N,S)

          INTEGER N         !Number of characters in s
          CHARACTER*(*) S   !Character string to be plotted
MGOLABEL(N,S) will make a label on the plot starting
at the current position of the graphics pointer (set with
MGORELOCATE or MGOGRELOCATE).
MGOSETEXPAND governs the size of the label,
MGOSETANGLE determines the angle between the text and the
horizontal, the weight of the lines making the characters is set by
MGOSETLWEIGHT. The line type is 0 (solid line). The
label will be centered vertically on the current location.
MONGO is capable of drawing characters from six different fonts:
Roman, Plain, Greek, Script, Tiny, and Old English (see the Appendix
for font tables). Any character can be italicized by slanting, except
for lowercase roman (which is a true italic), and text can be sub- or
superscripted. There are a number of commands that MONGO will
recognize when they are interspersed with the text. These commands
all begin with either one or two backslash characters, '\', and are
followed with a single character (or a single character and a number,
in the case of \jn). If one backslash is used, the
command will be applied only to the first character following the
command; if two backslashes, the command stays in effect until changed
or the end of the string occurs. The following commands are
possible:
| \\* | set mode * |
| \* | set mode * for next character |
| \r | change to Roman font |
| \p | change to Plain font |
| \g | change to Greek font |
| \s | change to Script font |
| \t | change to Tiny font |
| \o | change to Old English font |
| \i | toggle italics (slanting) on or off |
| \u | shift up for superscript |
| \d | shift down for subscript |
| \b | back up the width of the following character(s) |
| \w | draw a box in place of the following character(s) |
| \e | end of string |
| \c | end with a "carriage return" |
| \a | toggle advance with next char (allows overprinting) |
| \jn | justify character (as in PUTLABEL) |
| \0-\9 | insert value of user variable |
| \l(n) | insert n-th user label |
The font selection commands \r, \p, \g, \s, \t, and \o select
different fonts; the font table in the Appendix shows which symbol
corresponds to which typed character. The tiny font uses a minimal
number of vectors to make characters, and is therefore particularly
legible at small expansions; it is also the only fixed width font. The
command \i will cause the next character to be italicized. The command
\\i will italicize all ensuing characters until another \\i is
encountered. Note that this toggles italics on and off and thus is
conceptually different from shifting to an italic font. The
superscript and subscript commands \u and \d will shift the text line
up or down and decrease its size. When these modes end the text is
returned to the previous baseline and expansion. \b will back up the
current position of the graphics pointer the width of the following
character. \\b will cause MONGO to back up the width of all following
characters until another \\b is encountered. \e is used to end a
command, and is helpful because the end of the plotted string can
occur before N characters of the passed character string.
As an example, the call
           call label(50,'e\\u(x\u2+y\u2)\\d = (\ga + \gb)sin\u2\gq\e')

           or in the case of some UNIX environments

           call label(50,'e\\\\u(x\\u2+y\\u2)\\\\d = (\\ga + \\gb)sin\\u2\\gq\\e')
In most UNIX shells, the backslash is an escape character meaning "do not give the next character special meaning". So the first backslash of every backslash pair is sometimes ignored. Precicesly when a shell is invoked is a mystery to me so you will have to use trial and error to get the proper graphical string output in UNIX environments.
If a character string is written to a terminal, the string is written directly using the terminal's internal character generator when
EXPAND is set to 1 exactly,
ANGLE is 0, and
EXPAND to 1.0001 or put \e at
the end of the string.
A trick that is often useful in locating labels is to set the user
coordinates to something simple and mgorelocate with
respect to these coordinates. For example
           CALL MGOSETLIM(0.,0.,1.,1.)
           CALL MGORELOCATE(.05,.9)
           CALL MGOLABEL(50,'PLOT no. 1\e')
           CALL MGOSETLIM(0.,0.,1.,1.)
           CALL MGORELOCATE(.05,1.)
           CALL MGOPUTLABEL(50,'PLOT no. 2\e',9)
MGORELOCATE can be used to set the
graphics pointer outside of the graphics area and so put labels
outside of the graphics area.
          SUBROUTINE MGOPUTLABEL(N,S,LOC)

          INTEGER N         !Number of characters in S
          CHARACTER*(*) S   !Character string to be plotted at graphics pointer
          INTEGER LOC       !Justification of character string
MGOPUTLABEL(N,S,LOC) is just like
MGOLABEL except that the number LOC governs
how the string is justified with respect to the current graphics
pointer. LOC can range from 1-9, and the justification
selection is laid out as follows:
| string | ends | centered | starts | at pointer |
|---|---|---|---|---|
| above pointer | 7 | 8 | 9 | |
| centered on pointer | 4 | 5 | 6 | |
| below pointer | 1 | 2 | 3 |
For example, N = 1 means justify the string
so that it ends at the current pointer and lies below the current
pointer.
          SUBROUTINE MGOGSTRING(N,S)

          INTEGER N         !Number of characters in s
          CHARACTER*(*) S   !Character string to be plotted
MGOGSTRING is identical to MGOLABEL
except that the line type is not set to 0 (solid lines), so that the
line segments making up the line will correspond to the current line
type.
          SUBROUTINE MGOGSTRLEN(N,S,SLENGTH,SHEIGHT)

          INTEGER N         !Number of characters in s
          CHARACTER*(*) S   !Array of characters whose length is desired
          REAL SLENGTH      !Length of string s in device coordinates
          REAL SHEIGHT      !Height of string s in device coordinates
MGOGSTRLEN is used to compute the length
SLENGTH and height SHEIGHT of a string as it
will appear after plotting by MGOLABEL or
MGOPUTLABEL. These are dimensions in device coordinates.
Typical uses for MGOGSTRLEN are to justify or underline
strings.
          SUBROUTINE MGORELOCATE(PX,PY)

          REAL PX   !x (user) coordinate of graphics pointer
          REAL PY   !y (user) coordinate of graphics pointer
MGORELOCATE sets the location of the graphics pointer
to PX, PY (which are user
coordinates). MGORELOCATE is used to set the location of
the graphics pointer for other routines (e.g. MGOLABEL or
MGOPOINT), and it is also used with MGODRAW
(or MGOGDRAW) to draw a line segment.
          SUBROUTINE MGODRAW(PX,PY)

          REAL PX   !x (user) coordinate of end of line
          REAL PY   !y (user) coordinate of end of line
MGODRAW draws a line segment from the location of the
current graphics pointer to the coordinate PX,
PY (user coordinates) using the current line type
and weight. MGODRAW also sets the location of the
graphics pointer to PX, PY so that
MGODRAW commands can follow each other without
intervening MGORELOCATE commands (but a sequence of
MGODRAW commands should not be interrupted with other
plotting commands). All line segments are erased wherever they pass
outside of the current graphics area (use MGOLINE to
avoid this erasure).
          SUBROUTINE MGOGRELOCATE(PX,PY)

          REAL PX   !x (device) coordinate of graphics pointer
          REAL PY   !y (device) coordinate of graphics pointer
MGOGRELOCATE sets the location of the graphics pointer
to PX, PY (which are device
coordinates). MGOGRELOCATE is used to set the location of
the graphics pointer for other routines (e.g. MGOLABEL or
MGOPOINT), and it is also used with MGOGDRAW
(or MGODRAW) to draw a line segment.
          SUBROUTINE MGOGDRAW(PX,PY)

          REAL PX   !x (device) coordinate of end of line
          REAL PY   !y (device) coordinate of end of line
MGOGDRAW draws a line segment from the location of the
current graphics pointer to the coordinate PX,
PY (device coordinates) using the current line
type and weight. MGOGDRAW also sets the location of the
graphics pointer to PX, PY so that
MGOGDRAW commands can follow each other without
intervening MGOGRELOCATE commands (but a sequence of
MGOGDRAW commands should not be interrupted with other
plotting commands). All line segments are erased wherever they pass
outside of the current graphics area (use MGOLINE to
avoid this erasure).
          SUBROUTINE MGOLINE(PX1,PY1,PX2,PY2)

          PX1   !x (device) coordinate of start of line
          PY1   !y (device) coordinate of start of line
          PX2   !x (device) coordinate of end of line
          PY2   !y (device) coordinate of end of line
MGOLINE is a routine to draw a vector in device
coordinates. It uses the current line type (set by
MOGSETLTYPE), but does not erase the vector beyond
the boundary of the graphics area (unlike MGORELOCATE and
MGODRAW). A line that passes outside of the device limits
is truncated at the limits.
          SUBROUTINE MGOPOINT(N,ISTYLE)

          INTEGER N        !Number of sides of point
          INTEGER ISTYLE   !Style of point
MGOPOINT makes a single point at the current location
of the graphics pointer (see MGORELOCATE and
MGOGRELOCATE). N and ISTYLE
govern the point type. Points are always polygons, where
N specifies the number of sides; the parameter
ISTYLE determines the point style. The possibilities
are
| Index | Point style |
| 0 | open (vertices connected |
| 1 | skeletal (vertices connected to center) |
| 2 | starred |
| 3 | filled |
If N = 0 or 1, the point is a single
dot. When N gets large enough (10 or so), the polygon is
a good approximation to a circle. The MGOSETANGLE and
MGOSETEXPAND routines are also used extensively in
determining point types. For example to get a '+' symbol, use
MGOSETANGLE(45.) to rotate by 45 degrees the skeletal
square (an 'x') provided by MGOPOINT(4,1). Elaborate
point types can also be built by plotting more than one type of point
on top of another.
          SUBROUTINE MGOSETCOLOR(COLOR_INDEX)

          INTEGER COLOR_INDEX   !A pointer into the color table
MGOSETCOLOR(COLOR_INDEX)will select the active color
from the color table. COLOR_INDEX is the color table
index of the color to be selected. MONGO's color table has 32 entries
indexed from 0 to 31 inclusive. The selected color will remain active
until another call is made to MGOSETCOLOR. Color index 0
is the background color and color index 31 is the foreground
color. Use MGOSETPALETTE to define color table
entries. (If the output device is a printer, the background color is
generally not used since the paper color is, by definition, the
background color. So MONGO's background color is left in its undefined
state which is black. Unfortunately, black is also the default
foreground color for printers. Unexpected graphics can occur in this
state.)
MONGO's default color table depends on the device chosen. For PostScript printers, all 32 color table entries are black. For X-window terminals, entry 1 through 31 are foreground and entry 0 is background. The actual colors are determined during initialization when MONGO asks the graphics window for the values the window currently uses for background and foreground. Often the defaults are black for background and white for foreground.
          SUBROUTINE MGOSESTPALETTE(COLOR_INDEX, RED, GREEN, BLUE)

          INTEGER COLOR_INDEX   !A pointer into the color table
          REAL RED              !The intensity of red (0 - 1)
          REAL GREEN            !The intensity of green (0 - 1)
          REAL BLUE             !The intensity of blue (0 - 1)
MGOSETPALETTE(COLOR_INDEX, RED, GREEN, BLUE) will
define an entry in MONGO's color table. COLOR_INDEX is
the color table index of the color to be defined. MONGO's color table
has 32 entries indexed from 0 to 31 inclusive. Color table entry 0
will be used as the background color and entry 31 will be used as the
foreground color. Colors are defined using the RGB model. The values
of RED, GREEN, and BLUE specify the
intensity of red, green and blue used to generate the color. The
values of these parameters must lie between 0.0 and 1.0 inclusive and
indicate the fractional intensity of each color in the mix. For
example, RED=1.0, GREEN=1.0, BLUE=1.0 generates
white. RED=0.0, GREEN=0.0, BLUE=0.0 generates
black. RED=0.5, GREEN=0.5, BLUE=0.5 generates gray. Use
MGOSETCOLOR to select the active color.
          SUBROUTINE MGOCURSOR(X_POSITION, Y_POSITION, CURSOR_MODE)

          INTEGER CURSOR_MODE   !Cursor read/write (1/0)
          REAL X_POSITION       !X user coordinates of cursor position
          REAL Y_POSITION       !Y user coordinates of cursor position
MGOCURSOR(X_POSITION, Y_POSITION, CURSOR_MODE) sets or
reports the current position of the cursor on a graphics
window. (MGOCURSOR can be used to set the position of the
cursor on a hardcopy plot just as MGORELOCATE. However,
it is better to use MGORELOCATE to avoid any potential
errors. MGOCURSOR cannot read the position of the cursor
from a printer.) CURSOR_MODE can take two values. If the
value is 1, MGOCURSOR waits until a keystroke occurs and
then reports the current (x,y) position of the cursor in
user coordinates through the values of X_POSITION and
Y_POSITION. It also sets the current cursor position at
the reported position. If the value is 0, the routine sets the current
cursor position at the values specified by X_POSITION and
Y_POSITION.
The keystroke required for CURSOR_MODE 1 can originate
at the keyboard or the mouse. If a mouse button is used, two
keystrokes are generated (downstroke and upstroke). Programmers may
find this surprising. Also, the upstroke from the mouse sometimes
reports an erroneous location so encourage users to enter keystrokes
from the keyboard.
In CURSOR_MODE 1, the routine will not return until it
can report a position from MONGO's graphics window. Keystrokes
generated outside the context of MONGO's graphics window are ignored.
          SUBROUTINE MGOSETLTYPE(N)

          INTEGER N   !Value to which LTYPE is set
MOGSETLTYPE determines the line type. The
possibilities are:
| Index | Line Type |
|---|---|
| 1 | solid |
| 2 | dotted |
| 3 | short dash |
| 4 | long dash |
| 5 | dot-short dash |
| 6 | dot-long dash |
| 7 | short dash-long dash |
          SUBROUTINE MGOSETLWEIGHT(N)

          INTEGER N   !Value to which LWEIGHT is set
MGOSETLWEIGHT controls the thickness of all line
segments (including those making up points and characters) drawn on a
hardcopy device. Single weight lines are drawn for
N = 1, double weight lines are used for
N = 2, and so forth. If
N = 0, MONGO will not actually draw any lines,
although it will relocate the graphics pointer as though it had.
          SUBROUTINE MGOSETANGLE(A)

          REAL A   !Value to which ANGLE is set (degrees)
MGOSETANGLE sets the variable that controls the
rotation angle of points and text. Its argument is the rotation angle
in degrees counterclockwise, and the rotation is effective until set
to something else. The only text that is not affected are the labels
associated with a box: tick labels, MGOXLABEL,
MGOYLABEL, and MGOPLOTID.
          SUBROUTINE MGOSETEXPAND(E)

          REAL E   !Value to which EXPAND is set
MGOSETEXPAND sets the variable that controls the size
of points and text. Its argument is the expansion factor (default 1)
that multiplies the default size of points and characters. The
expansion is effective until reset. The expansion can also be changed
internally by the MGOWINDOW command and the
MGOPOINTS command, but these are reset as soon as these
routines end. Note that the size of labels associated with a box
are affected by MGOEXPAND.
          SUBROUTINE MGOSETLIM(PX1,PY1,PX2,PY2)

          REAL PX1   !x user coordinate of lower left of graphics area
          REAL PY1   !y user coordinate of lower left of graphics area
          REAL PX2   !x user coordinate of upper right of graphics area
          REAL PY2   !y user coordinate of upper right of graphics area
MGOSETLIM is used to set the user coordinates
associated with the graphics area (note that the argument order
differs from interactive MONGO). The user coordinates passed to
MGORELOCATE, MGODRAW,
MOGCONNECT, MGOPOINTS, and other commands
are defined relative to these user coordinates limits.
          SUBROUTINE MGOSETLOC(PX1,PY1,PX2,PY2)

          REAL PX1   !x device coordinate of lower left of graphics area
          REAL PY1   !y device coordinate of lower left of graphics area
          REAL PX2   !x device coordinate of upper right of graphics area
          REAL PY2   !y device coordinate of upper right of graphics area
MGOSETLOC is used to set the location and size of the
graphics area within the coordinates that are allowed by the
device. (PX1,PY1) and (PX2,PY2) are the
coordinates of lower left and upper right coordinates of the graphics
area in device coordinates. Unfortunately this means that
MGOSETLOC arguments that are appropriate for one device
will be wrong for another. If you are unsure of the capabilities of
the device you want to use, the best way to choose
MGOSETLOC coordinates is to select the desired output
device and then use the device's limiting coordinates
(LX1,LX2,LY1,LY2), which can be accessed by including the
MONGO.PAR common block.
          SUBROUTINE MGOWINDOW(NX,NY,K)

          INTEGER NX   !Number of window panes in the x direction
          INTEGER NY   !Number of window panes in the y direction>
          INTEGER K    !Number of current window pane
MGOWINDOW(NX,NY,K) is a means of selecting subsections
of the current graphics area for a new graphics
area. MGOWINDOW divides the total area into
NX horizontal and NY vertical pieces and
makes the current graphics area the K-th window pane,
where K = 1 is the lower left corner and
K is counted left to right, row by
row. MGOWINDOW(1,1,1) resets the graphics area its
original location before MGOWINDOW was executed.
          SUBROUTINE MGOPAGE(N)

          INTEGER N   !Page offset for subsequent graphics output
MGOPAGE(N) is used when a hardcopy device is chosen
(using MGOSETUP) to select a different page of paper for
output. N = 0 selects the first page,
N > 0 selects subsequent
pages. MGOPAGE accomplishes this effect by adjusting the
location of the graphics area so that output can be directed freely to
any output page, and the result on roll paper will be the same as on
fanfold paper.
          SUBROUTINE MGOSETPHYSICAL(PX1,PY1,PX2,PY2)

          REAL PX1   !Minimum x device coordinate
          REAL PY1   !Minimum y device coordinate
          REAL PX2   !Maximum x device coordinate
          REAL PY2   !Maximum y device coordinate
MGOSETPHYSICAL is used to change the limiting device
coordinates. Generally it is used only with a Versatec or similar
device, since a Versatec has a more or less unlimited range along the
direction of paper movement. MGOSETPHYSICAL can be used
to allow a very long plot or a plot that consists of many different
pages (or frames with MGOWINDOW).
          SUBROUTINE MGOSETFILL(PATTERN, MODE)

          INTEGER PATTERN   !The fill pattern code
          INTEGER MODE      !Termination code
MGOSETFILL(PATTERN, MODE) controls MONGO's fill
pattern and mode. When MGOSETFILL is called with
MODE set to 0, MONGO enters the normal fill mode.
Contours defined by
MGORELOCATE, MGODRAW,... MGODRAW are then
filled with the chosen pattern. Any command other than
MGODRAW will terminate the fill mode. If the command
sequence does not close the contour, MONGO connects the end point to
the start point before filling. When MGOSETFILL is called
with MODE set to 1, MONGO enters the extended fill
mode. Contours are again filled with the chosen pattern but only
another call to MGOSETFILL with PATTERN set
to 0 will terminate the fill mode. The extended mode is useful when
filling a region drawn with MGOCONNECT or when a curve
might leave the graphics area (thereby incurring an
MGORELOCATE when it reenters the area.)
Valid values for MODE are 0 and 1.
Valid values for PATTERN lie between 0 and 20
inclusive. A value of 0 terminates the fill mode. Any other valid
value specifies a fill pattern as listed in the following table.
| 1 | Solid |
| 2 | 75% fill |
| 3 | 50% fill |
| 4 | 25% fill |
| 5 | Narrow vertical line |
| 6 | Narrow horizontal lines |
| 7 | Wide vertical line |
| 8 | Wide horizontal lines |
| 9 | Narrow left slant lines |
| 10 | Narrow right slant lines |
| 11 | Wide left slant lines |
| 12 | Wide right slant lines |
| 13 | Narrow grid |
| 14 | Wide grid |
| 15 | Diagonal grid |
| 16 | Small bubbles |
| 17 | Large bubbles |
| 18 | Escheresque weave |
| 19 | Basket weave |
| 20 | Mixed bubbles |
SUBROUTINE MGOINIT()
When MONGO subroutines are called directly from another program, it
is important to call first the subroutine MGOINIT. This
routine reads the environment (logical) variable
'MONGOFILES' and tells MONGO where to find the font file
and the hardcopy rasterization file. It also tells the linker on VMS
to find and execute the 'block data' routine that initializes MONGO
when it is compiled. MGOINIT is automatically executed
when the MONGO subroutine is called, so it is only
necessary for subroutine mode.
          SUBROUTINE MGOSETUP(N)

          INTEGER N   !Device number of output device
MGOSETUP instructs MONGO to direct its output through
subroutines appropriate for device N, and it initializes
a number of variables such as plotting limits and location of graphics
area for the selected device. If N is greater than 0, a
terminal is selected for output; if N is less than 0 a
hardcopy device is selected for output. Odd negative N
selects an output orientation that has x along the short edge of the
paper (portrait orientation), and even negative N selects
an output orientation that has x along the long edge of the paper
(landscape orientation). Currently the device assignments
are:
| Type | Device | Type | Device | Orientation | |
|---|---|---|---|---|---|
| 1 | Retrographics 640 | -1 | Versatec | Portrait | |
| 2 | DEC VT120/240 Regis | -2 | Versatec | Landscape | |
| 3 | Tektronix 4010/4014 | -3 | Printronix | Portrait | |
| 4 | Grinell 270 | -4 | Printronix | Landscape | |
| 5 | HP 2648A | -5 | PostScript | Portrait | |
| 6 | Sun Windows | -6 | PostScript | Landscape | |
| 7 | X Windows |
When MGOSETUP selects a printer for output, it does
not initialize an output file for the plot; this must be done
explicitly by MGOPRNTINIT or
MGOERASE. MGOSETUP does set all other
variables appropriate for plotting, however, so MGOSETUP
can be used to transfer output from a printer to a terminal and back
to the printer without losing the output originally sent to the
printer file.
          SUBROUTINE MGODEVICE(N)

          INTEGER N   !Device number of output device
The subroutine MGODEVICE sets a variable which MONGO
uses to select subroutines appropriate for a given device. The device
assignments are as listed under MGOSETUP. Note that
MGOSETUP is functionally the same as first calling
MGODEVICE and then MGOTSETUP or
MGOPSETUP.
SUBROUTINE MGOTSETUP()
MGOTSETUP instructs MONGO to direct its output to a
graphics terminal (selected by MGODEVICE) and initializes
a number of variables such as plotting limits and location of graphics
area to default values.
SUBROUTINE MGOPSETUP()
MGOPSETUP instructs MONGO to direct its output to a
hardcopy device (selected by MGODEVICE) and initializes a
number of variables such as plotting limits and location of graphics
area to default values.
SUBROUTINE MGOTIDLE()
MGOTIDLE will flush any graphics output to the
currently selected graphics terminal and set the terminal to 'idle
mode.' This is essential for any routine that uses a terminal as both
a graphics device and as an ordinary terminal simultaneously.
Terminal graphics output is ordinarily buffered and
MGOTIDLE can be used to flush the buffer so that all
current output will be sent to the terminal.
SUBROUTINE MGOTCLOSE()
MGOTCLOSE closes the channel to the currently selected
graphics terminal. Its sole use is when there is a single graphics
terminal which will allow only one process to access it at a time, and
you want to allow another user access to the device without
terminating MONGO.
SUBROUTINE MGOPRNTINIT()
Making a plot on a hardcopy device is fundamentally different than
on a terminal. On a hardcopy device, MONGO must store the plotting
output and then put it out all at once when the plot is complete.
MGOPRNTINIT opens a new file for hardcopy output; output
that has gone to another file without being plotted is
lost. MGOPRNTINIT (or MGOERASE which calls
MGOPRNTINIT) must be called before output is sent to a
printer. Note that MGOSETUP must be called in
conjunction with MGOPRNTINIT: one sets variables that
MONGO requires internally, and the other opens a file for output
vectors.
          SUBROUTINE MGOPRNTPLOT(NVEC)

          INTEGER NVEC   !Number of vectors plotted
In order to cause a plot to be made on a hardcopy device, use the
routine MGOPRNTPLOT. It will close the file opened by
PRNTINIT (which has presumably been filled with vectors),
and submit a batch job to rasterize it and plot it on the printer. The
number of vectors plotted is returned as the value of
MGOPRNTPLOT. MGOPRNTPLOT also automatically
executes a new MGOPRNTINIT.
These are the symbols found in the seven fonts that MONGO provides. There are symbol entries for most of the 96 ASCII non-control characters. Each font is arrayed in columns with the different font entries for a single character making up a row. The fonts are listed as
The description of LABEL explains how the various
fonts are accessed. Note that the only 'italic' font shown is Roman,
because the Roman font has a true italic lower case. Any other font
can also be slanted by using the italic command. PostScript Font Table
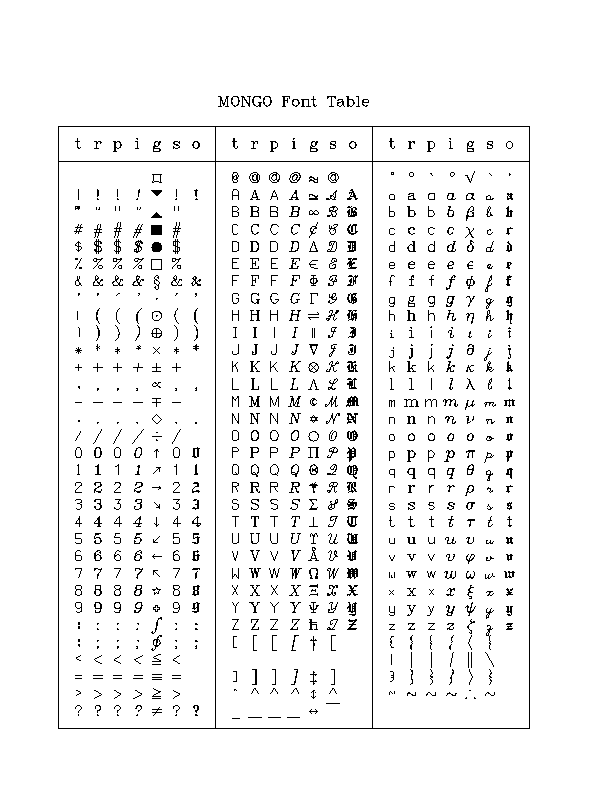
MONGO consists of layers of subroutines, each layer more specific than the next. At the top is MONGO, the interactive subroutine, and at the bottom are the routines that drive the actual devices. The subroutines that are likely to be of interest to the user are listed in the following 'dependency chart' that shows how the subroutines depend on one another.
Roughly speaking, a subroutine that is connected to another subroutine below it depends on the lower subroutine in a fundamental way, but offers a plotting function that would be complicated to achieve with the lower subroutines alone.
The levels of the dependency chart, which are labeled 1-7, have the following significance:
MONGOPAR
common block which consists of the most basic variables to which all
routines refer).
The following examples show sequences of interactive commands and
the plots that result. Note that there are no device specification
commands listed here, although they must be provided before these
plots can be made. Thus these lists of commands could be preceded by
TERMINAL or PRINTER, and a hardcopy could be
made with HARDCOPY after PRINTER was
selected. You may download the source, ex001.pl, and data, example.dat, for this example. PostScript ex001
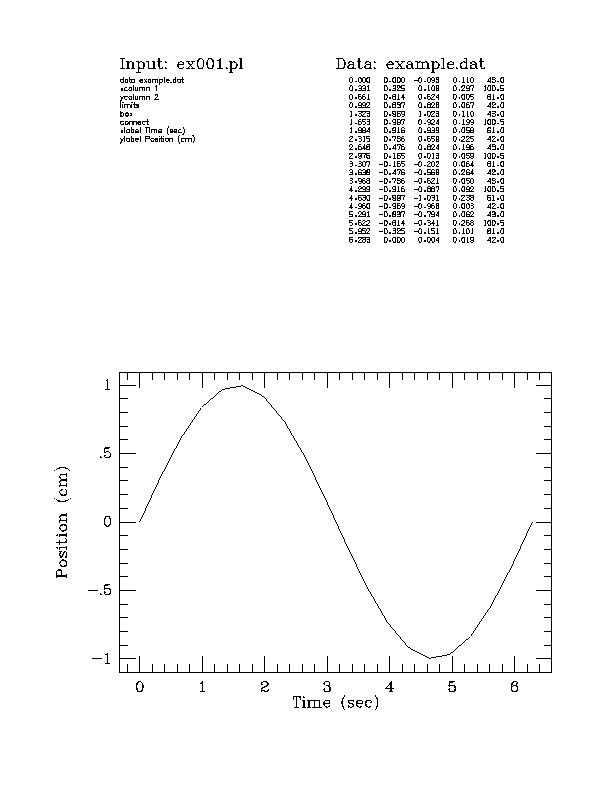
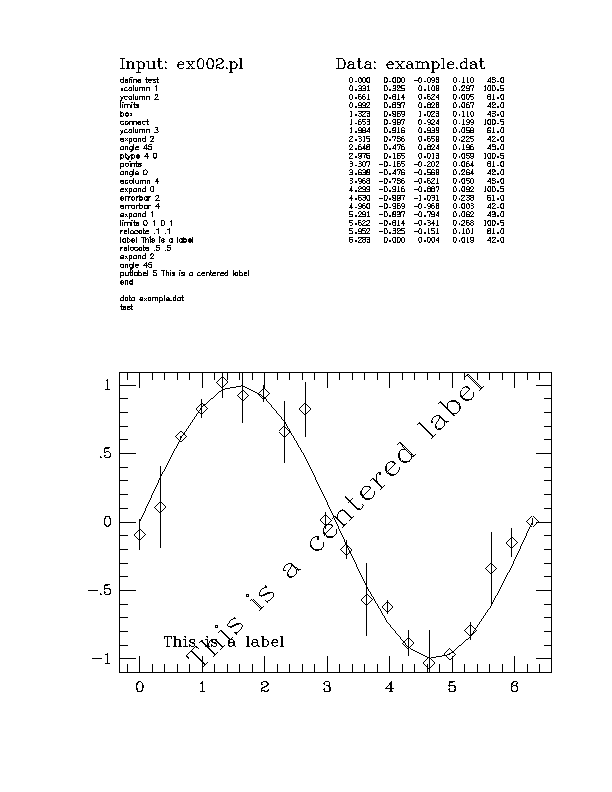
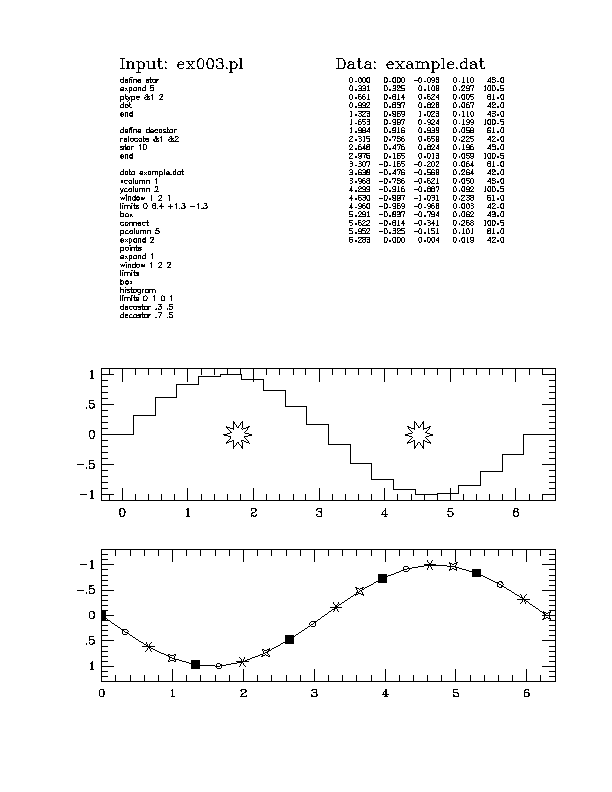
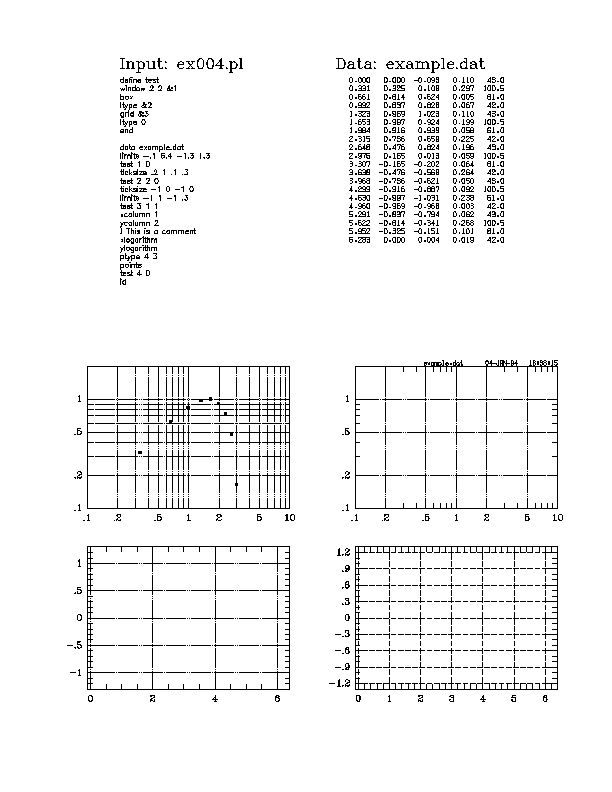
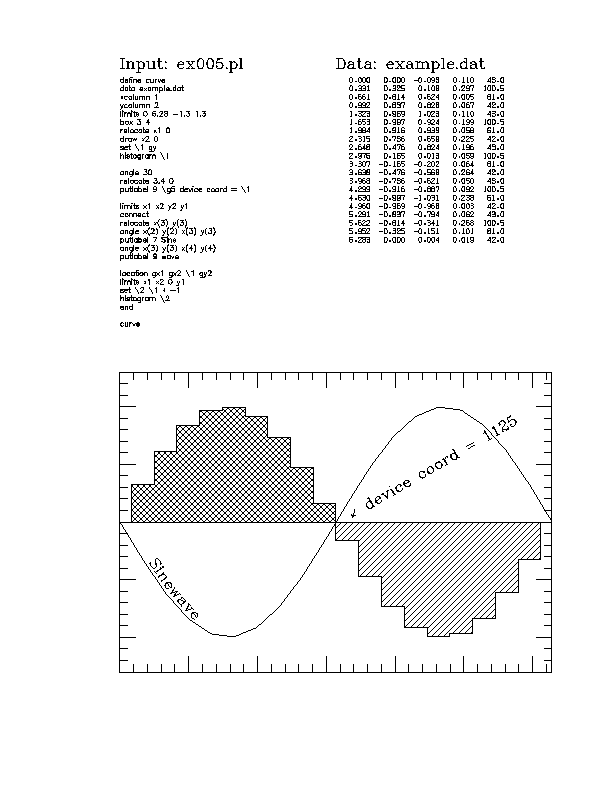
cos3(x) function might be plotted using MONGO
subroutines. Notice that this program inquires what sort of output
device is needed and calls different MONGO routines depending on
whether the device is a terminal or a printer. You may download the
source, cos3.f, for this example.
      REAL X(100), Y(100)
      CHARACTER*80 STRING
C Inquire which output device to use
      WRITE(6,6000) 'Enter terminal number (- for printer): '
6000  FORMAT(1X,A,$)
      READ(5,*) ITERM
C Initialize MONGO for the selected output device
      CALL MGOINIT
      CALL MGOSETUP(ITERM)
      CALL MGOERASE
      IF(ITERM.LT.0) THEN
          CALL MGOSETLWEIGHT(2)
      END IF
      PI = 3.14159265
C Set the user coordinates and make a coordinate box
      CALL MGOSETLIM(0.,-1.5,2*PI,1.5)
      CALL MGOBOX(1,2)
C Compute the points on the curve
      DO 10 I = 1,100
          ANGLE = 2*PI*FLOAT(I-1)/99
          X(I) = ANGLE
          Y(I) = COS(ANGLE)**3
10    CONTINUE
C Draw the curve
      CALL MGOCONNECT(X,Y,100)
C Plot '+' symbols at each point
      CALL MGOSETANGLE(45.)
      CALL MGOPOINTS(41.0,1,X,Y,100)
      CALL MGOSETANGLE(0.)
C Put a label on the plot
      CALL MGOSETEXPAND(2.)
      WRITE(STRING,1000)
1000  FORMAT('y = cos\u3(x)\e')
      CALL MGORELOCATE(.5,1.2)
      CALL MGOLABEL(80,STRING)
C Finish the plot
      IF(ITERM.LT.0) THEN
          CALL MGOPRNTPLOT(NVEC)
          WRITE(6,*) NVEC, ' vectors plotted'
      ELSE
          CALL MGOTIDLE
      END IF
      STOP
      END
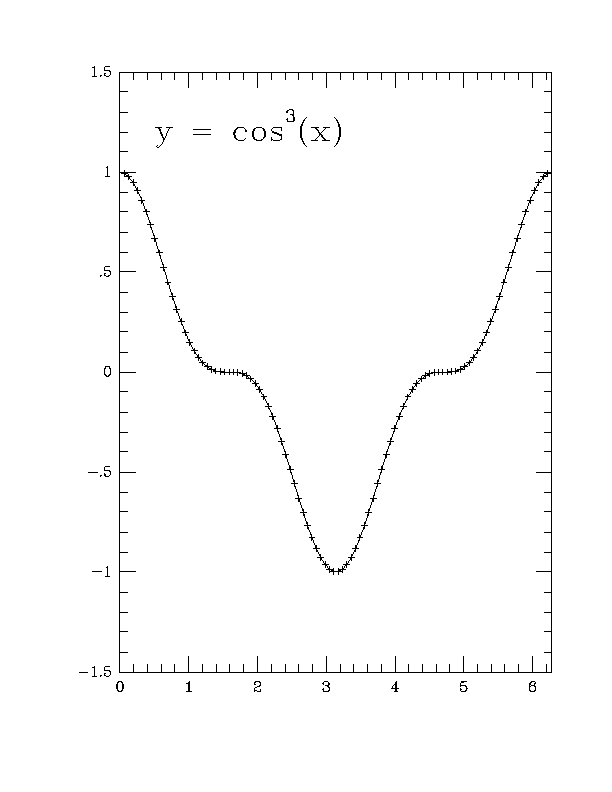
Here is a FORTRAN program that computes a two-dimensional function
and then uses 'interpreter mode' to plot it. This program does little
more than compute the data and then instruct MONGO to read a file of
commands which actually create the plot. This command file then
partitions the available graphics area for the three plots in a
relatively device-independent way, using the SET command
and the user variables. You may download the source, test3d.f, for this
example.
      PARAMETER (N=50, PI=3.14195265)
      REAL Z(2*N,N)
      CHARACTER*80 COM(8), LINE
      WRITE(6,'(1x,a,$)') 'Enter output device (+/- for term/printer): '
      READ(5,*) ITERM
      WRITE(LINE,'(I1)') IABS(ITERM)
      DO 10 J = 1,N
          Y = 4*PI*(2*J-(N+1))/FLOAT(N-1)
          DO 11 I = 1,2*N
              X = 4*PI*(2*I-(2*N+1))/FLOAT(2*N-1)
              R = SQRT(X*X+Y*Y)
              Z(I,J) = COS(R)/(1+R)
11        CONTINUE
10    CONTINUE
      COM(2) = 'INPUT test3d.pl'
      COM(3) = 'PARTITION'
      COM(4) = 'PLOT1'
      COM(5) = 'PLOT2'
      COM(6) = 'PLOT3'
      IF(ITERM.GT.0) THEN
          COM(1) = 'TERMINAL ' // LINE(1:1)
          NCOM = 7
      ELSE
          COM(1) = 'PRINTER ' // LINE(1:1)
          COM(7) = 'HARDCOPY'
          NCOM = 8
      END IF
      COM(NCOM) = 'END'
      CALL MONGO(NCOM,COM,2*N,N,Z)
      STOP
      END
The contents of the interactive command file,
test3d.pl, read by MONGO is listed below. You may
download the source, test3d.pl, for this
example.
define partition    ! This allocates space for the three plots
set \0 gx2 - gx1    ! \0 is the width of the entire plot in device coords
set \1 gy2 - gy1    ! \1 is the height of the entire plot in device coords
set \2 \0 + \1      ! \2 is an average, ok for both portrait and landscape
set \2 \2 * 0.17    ! \2 is now the height of the halftone plot
set \5 gx1 + gx2
set \5 \5 * 0.5     ! \5 is the x center of the plot
set \0 \0 * 0.05    ! \0 is a gap in x between the 3d and line plot
set \1 \1 * 0.1     ! \1 is a gap in y between halftone and others
set \6 gx1          ! save gx1
set \7 gx2          ! save gx2
set \8 gy1 + \2     ! save gy1
set \9 gy2          ! save gy2
end

define plot1        ! This makes the line plot
set gx1 \5 + \0     ! set gx1 to gap width right of center
set gx2 \7          ! set gx2 to right boundary
set gy1 \8 + \1     ! set gy1 to gap width above halftone plot
set gy2 \9          ! set gy2 to top boundary
xcolumn -100        ! create abscissa for plot
ycolumn 25          ! extract center cut through data array for y
limits              ! set plot limits
box 111 112         ! put a box with plain labels around the area
connect             ! connect the curve
end

define plot2        ! This makes the 3d-plot
set gx1 \6          ! set gx1 to left boundary
set gx2 \5 - \0     ! set gx2 to gap width left of center
set gy1 \8 + \1     ! set gy1 to gap width above halftone plot
set gy2 \9          ! set gy2 to top boundary
3dplot 40 30 0.5    ! 3d-plot, altitude = 40, azimuth = 30, datamax = 0.5
end

define plot3        ! Makes the halftone and contour plot (2x1 aspect)
set gx1 \5 - \2     ! set gx1 to one height left of center
set gx2 \5 + \2     ! set gx2 to one height right of center
set gy1 \8 - \2     ! set gy1 to bottom boundary
set gy2 \8          ! set gy2 to one height above bottom
contour 1 0         ! draw one contour level at data = 0
halftone -0.1 0.6   ! make halftone plot: -0.1 = background, +0.6 = set
limits 0 100 0 50   ! set limits of plot
box                 ! put a box around the area
end
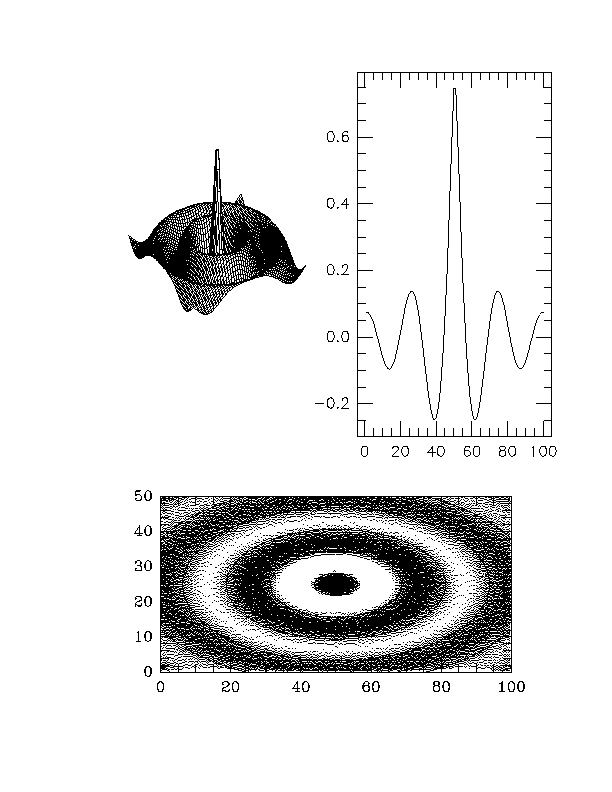
Installing MONGO involves a number of steps. The first is to compile MONGO and its subroutine library. Next, you must choose which hardcopy rasterizers to compile, and compile them. Third, you must edit a number of files that tell MONGO where to find its data files, and which run hardcopy rasterization jobs when a hardcopy plot is to be made. Finally, you must copy all the pertinent files to whatever destination directory you desire.
There will be differences, obviously, between the procedures for
VMS and UNIX systems, so whenever these differences arise the
installation instructions will be system specific. For the purposes of
this description, it will be assumed for VMS systems that the MONGO
directory hierarchy is found in [MONGO...], and for UNIX
systems that the directories are /u1/mongo/*.
Before you start the installation, decide where you want the
resulting programs and files to reside. On a VMS system, you may
decide to put everything in a directory [MONGO]. On a
UNIX system, you may want to put executables in
/usr/local/bin, libraries in /usr/local/lib,
and sundry files in /usr/local/lib/mongo.
First of all, look at the file blockdata.f in the
sysdepunix or sysdepvms directory. This
contains all the defaults for where MONGO will look for its
files. Alter them to reflect where you will eventually install
MONGO.
Compiling MONGO and its library is achieved by the following commands:
$ set default [mongo.source]
$ copy [.sysdepvms]*.com []
$ library /create [-]mongo
$ @compile devices
$ @compile interact
$ @compile plotsub
$ @compile sysdepvms
$ @link
You then need to build the binary font file that MONGO will use:
$ fortran crunch
$ link crunch
$ run crunch
This reads the ascii font file fonts.dat and creates a
b inary file fonts.bin.
In order to compile MONGO and its library, you must first edit the Makefile to reflect your system
$ cd /u1/mongo/source
$ cp sysdepunix/Makefile .
Edit the Makefile according to the instructions you find there. Basically the choices are between Sun Windows systems, and other Berkeley 4.2/4.3 or Ultrix systems. If you have a Sun system you need to give the compiler the flags appropriate for whatever floating point hardware is available.
Next compile the library, MONGO, and create the binary font file
fonts.bin from the ascii font file fonts.dat
by:
$ make
$ make crunch
The first file that needs to be provided for MONGO is called
mongofiles.dat, and is found in sysdepvms
and sysdepunix. It consists of four lines that tell MONGO
the location of
help.dat,
fonts.bin,
cmdfile.dat, and
For example, the VMS mongofiles.dat might be:
[mongo]help.dat
[mongo]fonts.bin
[mongo]cmdfile.dat
3 'TT:' -6
The corresponding UNIX file mongofiles.dat would be:
/usr/local/lib/mongo/help.dat
/usr/local/lib/mongo/fonts.bin
/usr/local/lib/mongo/cmdfile.dat
3 '/dev/tty' -6
There is a chain of defaults that govern how MONGO starts up. First
there are the defaults that MONGO is compiled with, which are found in
the blockdata file. This gives defaults for the locations
of the various data files. This default can be overridden by having
the logical name (VMS) or environment variable (UNIX)
MONGOFILES set to the location of the file
mongofiles.dat. If found, the
mongofiles.dat file provides MONGO with locations of its
sundry startup files, and a default terminal and printer number, and
terminal device. The cmdfile.dat found by MONGO tells it
how to start a hardcopy procedure (see below). Finally, if the
logical name (VMS) or environment variable (UNIX)
MONGOTERM is defined, the default terminal device is set
to this instead. Although MONGO should be compiled with correct
defaults, it is suggested that users have the logical name (VMS) or
environment variable (UNIX) MONGOFILES defined.
MONGO can make hardcopy plots on three varieties of printer: a Versatec V80, Printronix printers, and 300 dot-per-inch laser printers. The process by which MONGO creates a hardcopy plot consists of a number of steps.
PRINTER command
MONGO uses the printer characteristics found in the setup
subroutines in the files in the devices directory to
determine how to scale the output vectors to fit.
mgoHHMMSS.vec and is
written to the scratch or temporary directory.
HARDCOPY command), MONGO spawns a subprocess that is
given the name of this intermediary file, and which is expected to
create a plot file acceptable to the hardcopy device and print it.
In this way MONGO is insulated from the exact characteristics of a
given hardcopy device (other than a few set-up parameters) and the
user is spared waiting for this rasterization process. The
rasterization procedure (step 3 above) goes through three stages
itself. First, MONGO reads a file called cmdfile.dat
which tells MONGO what command the operating system would like to see
in order to start the rasterization process for each of the three
allowed printers. This is where MONGO communicates the name of the
intermediary file to the spawned subprocess, by causing the system to
execute the appropriate line from cmdfile.dat with the
name of the 'vector file' appended to this line. Next, the subprocess
started by MONGO executes the commands found in a rasterization
command file. Finally, the subprocess runs a rasterization program
that converts the 'vector file' to a 'plot file' that is acceptable to
the hardcopy devices, and then prints this 'plot file.'
At each stage there is some flexibility. MONGO can be given
different commands to execute in cmdfile.dat; the exact
commands executed by the subprocess can be altered; and the actual
rasterization program can do different things. The possibilities will
be made more clear by the specific examples below. To summarize these
steps:
mongofiles.dat which tells it where to
find cmdfile.dat.
cmdfile.dat
PRINTER command creates a new 'vector file' and
informs MONGO of a printer's characteristics.
HARDCOPY command closes the 'vector file', and
MONGO executes the appropriate line from cmdfile.dat with
the name of the 'vector file' appended.
cmdfile.dat.
The first stage in the rasterization chain is the file
cmdfile.dat. This file may be found in
rastervms and rasterunix, and it needs to be
edited according to your system. It consists of three lines, each
corresponding to the action you want MONGO to take when it is time to
make a hardcopy on the three devices, Versatec, Printronix, and laser
printer. The line that you enter will have the name of the
intermediary vector file appended and then will be executed by the
operating system. If you want no action to be taken (if you do not
have such a device), use the procedure nojob. Generally,
you will only need to alter this file to refer to the directory where
the rasterization procedures are found.
For example, the VMS cmdfile.dat might be:
submit /nolog [mongo]vtrast /param=
submit /nolog [mongo]nojob /param=
submit /nolog [mongo]imrast /param=
The corresponding UNIX file would be:
/usr/local/bin/vtrast
/usr/local/bin/nojob
/usr/local/bin/lwrast
Note that this file allows you the possibility of directing hardcopy to different physical devices of the same type, by having two versions of the file around, and two different rasterization procedures referred to in each one.
Each hardcopy device has an associated command procedure (VMS) or
shell script (UNIX). These files are found in the directories
rastervms and rasterunix, and have the same
prefix as the corresponding rasterization program (see below). For
each hardcopy device that you intend to use you must make sure that
the associated procedure will
On VMS systems, the logical name vectorfile is set to
the input vector file, and plotfile is set to the output
plot file (whose name is constructed from the input file). On UNIX
systems the rasterizers expect to read one or two lines from the
standard input, the first being the input vector file and the second
(if the rasterizer needs it) being the output plot file.
Generally speaking, you will need to edit the rasterizer procedures so that the directory where the rasterizer programs are found is correct and so that the output file will be directed to your printer.
For example, the VMS rasterization procedure for imraster is
imrast.com:
$! Rasterization command procedure for Imagen printer
$! NOTE: alter the [mongo] directory for your system and
$!  make the "print" command send the output file to the right printer
$ assign 'p1' vectorfile
$ flength = 'f$locate(".",p1)'
$ pfile := 'f$extract(0,flength,p1)'".PLT"
$ assign 'pfile' plotfile
$ run [mongo]imraster
$ imprint /impress plotfile /delete
$ delete 'p1';
The corresponding UNIX rasterization procedure for imraster is
imrast:
# NOTE: You must change /usr/local/bin to wherever the rasterizers are kept
#       and use whatever "lpr" command is necessary to print the file with
#       'impress' language selected. (e.g. ipr -Limpress)
set plotfile=$1.plt
/usr/local/bin/imraster <<end
$1
$plotfile
end
ipr -Limpress $plotfile
rm $1
rm $plotfile
There are five rasterization programs provided with MONGO,
appropriate for Versatec V80 printers, Printronix (or Trilog)
printers, Imagen 8/300 laser printers, QMS Lasergrafix laser printers,
and Apple LaserWriter laserprinters. The source code is found in the
subdirectories rastervms and rasterunix. The
following table gives the name of the actual programs and the other
programs that must be linked to them:
| Device | Hasterizer | Also needs | |
|---|---|---|---|
| Versatec V80 | vtraster | vtline, chopper, tvfont.par | |
| Printronix | pxraster | chopper | |
| Imagen | imraster | chopper | |
| QMS Lasergrafix | lgraster | chopper | |
| LaserWriter | lwraster |
(tvfont.par can be found in the include
subdirectory). The Printronix rasterizer will also create files
acceptable to a Trilog printer, but must be altered to reflect the
increased resolution of the Trilog printer (as must be the file
prntrnx.f in the devices directory).
These programs may need slight alterations according to your
system. In particular, the exact sort of file and the exact format of
the data in the file depends not only on the hardcopy devices, but on
the way that the hardcopy device is interfaced to your system. The
Versatec V80 is a good example of this. Versatec printers are
sometimes connected to a printer queue with a print symbiont, in which
case there must be some way to communicate to the symbiont that a line
of data is to be plotted instead of printed. These flags may consist
of a file header or a special code at the beginning of each
line. Alternatively, some systems have a Versatec as a directly
addressed device, in which case the program may need to write directly
to the device rather than putting its output in a file. The file
vtline provides four routines: vtopen,
vtclose, vtline, and vtff,
which are supposed to open the output file (or channel to the device)
and possibly write a header, close the file or channel, write a plot
line to the file or device, and cause a formfeed. There are a number
of examples of routines in the vtline file which have
worked at one time on some system or other.
Another difficulty to be aware of is that devices that receive
binary (as opposed to ascii) data (Versatec, Printronix, Imagen) need
to have their bytes in the correct order. VAX computers have a
different byte ordering than do IBM convention cpus, such as 680x0
microprocessors. If you have such a hardcopy device, be sure to edit
the rasterization program and set the variable byteswap
to true or false.
Unfortunately, it is not possible to be more specific than this. All rasterization programs will correctly read MONGO vector files, and create output data that will be recognized by the hardware. The only difficulty lies in negotiating the straits of the operating system. Good luck.
It is relatively easy to write a driver for other hardcopy
devices. First of all, alter one of the existing hardcopy device files
in the devices directory so that the setup
routines reflect the capabilities of the device. Your device will now
be addressed with the appropriate PRINTER command. Next,
pick the rasterizer for the device that most resembles yours and alter
the code that does something to the vectors that are read from the
MONGO intermediary file. Compile the new program, create a
rasterization command procedure for it, alter cmdfile.dat
to execute this procedure, and you are done.
To sum up then, select the rasterization programs that correspond to whatever devices are on your system. Alter them, if necessary, so that they respect the byte order that your cpu understands, and so that they can be directed to your device. Compile and link a program for each type of device that you have.
MONGO is now ready for final installation. First, copy the
executable file mongo and the library
mongo.olb (VMS) or libmongo.a (UNIX) to
their destination directories (don't forget to
ranlib libmongo.a on UNIX systems). Next, copy the
rasterization programs and command procedures to their destination
directories (the procedures having been altered to reflect this
directory, and the proper print command). Finally, copy
fonts.bin, help.dat,
cmdfile.dat, and mongofiles.dat to their
final directories (cmdfile.dat and
mongofiles.dat having been edited to reflect these final
directories).
You will find a number of test command files and FORTRAN programs
in the subdirectory test which you may find useful.
The commands VERSATEC and VTLONG have
been replaced by PRINTER 2 and PRINTER 1
respectively in order to allow more than one printer to be accessed by
MONGO and to make the commands symmetric with TERMINAL.
SHOW has a new format which displays more information
in a clearer fashion than the old version.
AXIS has different arguments, taking 10 now instead of
9, so that the axis end point is specified directly rather than by
using ANGLE and the length of the axis in device
coordinates.
The predefined macro ALL has been renamed
BUFFER so that the command WRITE buffer file
will write the command buffer to the file file and
WRITE all file will write all currently defined macros as
well as the command buffer. Previously each macro had to be written
individually to a different file.
The symbols in the greek font have been slightly changed, and the tiny font has been enlarged so that its default size is the same as the other fonts.
Line weights of 0 now cause no line to be drawn, and line weights greater than 1 cause correspondingly thick lines on terminals.
PRINTER now exists to allow different hardcopy
printers to be used without recompiling MONGO. TERMINAL 6
adds Sun Windows to the list of graphics terminals that MONGO can
address. DEVICE is provided to change output devices
without reinitializing printer plots.
MONGO now allows a limited set of symbolic variables to be used as
command arguments, and provides 10 user variables. These variables can
be set or altered with the command SET, and
SET also provides a capability for doing arithmetic.
There are a number of routines provided to display two-dimensional
data passed to MONGO via its subroutine call. CONTOUR
will make a contour plot of a data array. 3DPLOT will
make a perspective view of a grid of lines following the hills and
valleys of a data array. HALFTONE draws a grayscale plot
of an array of data, where the density of dots indicates the value of
the data. VFIELD represents a vector field as a field of
arrow symbols.
MONGO has a more extensive font file. New fonts include a plain (sans serif) font, a lower case roman italic font, and an Old English font. Alterations to existing fonts include expansion of the tiny font to the same default size as the other fonts, and the inclusion of new symbols in the greek font. User variables are expanded to their current numerical values when they are included as part of a character string.
A CURSOR command has been added to take advantage of
the cursor capability of most terminals.
The command WRITE can now be instructed to write
all which results in the writing of all existing macros
(prefixed by DEFINE and suffixed by END) and
the contents of the command buffer to a file.
Data files that do not conform to the specifications required by a
FORTRAN list-directed read can be read by using the command
FORMAT which provides MONGO with a FORTRAN read
format. When data is provided to MONGO via its subroutine call,
DATA can be used without or with an argument to switch
between this internal data and an external data file. DATA
stdin ... enddata can be used to supply MONGO with data from
the interactive input stream. If XCOLUMN is given a
negative argument, MONGO fills its internal x array with the integers
between 1 and the absolute value of the argument.
A number of MONGO commands accept new argument lists.
PTYPE p will set the point type to the floating
point specification p used by PCOLUMN. The
current point type is available in the point style array as
p(1). box m n allows the user to
specify orientation and fonts to be used in the labels on a coordinate
box. ANGLE p1 q1 p2 q2 permits a
rotation angle to be given as the slope of a line segment instead of
an actual angle. HISTOGRAM gy provides for hatching
the area under a histogram.
On UNIX systems, MONGO can take a command line argument when it is invoked that is the name of a file of MONGO commands. This file is processed by the interpreter and then MONGO reads from the standard input.
MONGO has been completely rewritten in order to remove the VAX/VMS FORTRAN enhancements from the code. MONGO now uses only a few, common enhancements to ANSI standard FORTRAN-77 such as variable names longer than 6 characters. As a result MONGO will now compile using the Berkeley 4.2BSD UNIX f77 compiler, and new system-dependent routines have been added to make MONGO completely UNIX compatible.
Subroutine names have all been prefixed by 'MGO' in
order to avoid confusion with user subroutine names. A compatibility
file, mongo83.f, is supplied that translates the old
MONGO 1983 names into the MONGO 1987 names. FORTRAN output unit
numbers have been consolidated and reassigned in order to conform with
the f77 compiler. The mongopar common block has been
slightly changed to accommodate output devices that have rectangular
pixels, and the user variables have been appended. The format of the
file where output directed to a printer accumulates has been changed
in order to make it more efficient for laser printers. This will most
likely not affect any user, unless he chooses not to use the
rasterizer routines provided.
The subroutine MGOVFIELD has been changed so that the
arrow directions are specified in degrees instead of radians, in
keeping with the rest of MONGO.
MGOAXIS now takes 10 arguments instead of 9, so that
the starting and ending points of an axis are explicitly given,
instead of using the angle variable and the length of the
axis.
It is now strongly suggested that the user include the
MGOINIT subroutine in his code in order to initialize
MONGO. Failure to do this means that MONGO will use whatever defaults
for the font file and rasterization command file that it was compiled
with, and it also means (for the VMS compiler) that the blockdata
routine that initializes MONGO will not automatically be executed when
the user's routine is linked to MONGO.
Only one logical assignment or environment setting is necessary now
in order to run MONGO (the file mongofiles.dat contains
several lines that contain all the information that used to be
specified individually).
MGOSETUP now provides a consistent initialization
routine for terminals and printers. It is the only call required to
send output to a terminal, and along with MGOPRNTINIT or
MGOERASE, it will prepare MONGO to send output to a
printer.
MGOHATCH will draw a histogram of data in the same way
as MGOHISTOGRAM, but in addition will hatch the area
between the histogram and a user specified horizontal line with either
+45 or -45 degree lines.
MGOHALFTONE will make a gray-scale picture of
two-dimensional data passed to MONGO via its subroutine call.
The current speed of MONGO is limited to roughly 1 ms per graphics operation because of the overhead from the nested subroutine calls that give MONGO its modularity. This will be improved in future versions.
The HALFTONE routine can be very slow, and can
generate very large files on a hardcopy printer. Currently, MONGO
takes roughly 30 ms per pixel in the output image (which is the size
of the current graphics area). Each dot making up the picture that is
actually drawn is treated as an individual vector, which requires an
additional 1 ms and roughly 10 bytes in a laser printer output
file. Thus if you are creating a very large and dark plot (e.g. 1000
by 1000 and 50% black), you may find that MONGO takes a very long
time, and the hardcopy file is too large to print. This will also be
addressed in future releases.
Using DATA stdin can fail if you are in a directory
for which you do not have write permission, because MONGO puts the
data that you send it in a scratch FORTRAN file in the current
directory.
PRINTER n device ignores the device
specification because it is not very useful and is very system
specific.
I've never tried the Grinell code on a UNIX system, and it may not work.
The subroutines documented in this section are not a part of the standard distribution. They will soon be available at http://www.lowell.edu/users/koehn.
          SUBROUTINE MGOGETLOC(X1,Y1,X2,Y2)

          REAL X1   !X device coordinate, lower left corner of plot region
          REAL Y1   !Y device coordinate, lower left corner of plot region
          REAL X2   !X device coordinate, upper right corner of plot region
          REAL Y2   !Y device coordinate, upper right corner of plot region
This routine will return the device coordinates of the lower
left and upper right corner of the user plot region. The default
values depend upon the device chosen. MGOGETLOC and
MGOGETPHYSICAL are useful when the plot region must be
repositioned or changed in size.
          SUBROUTINE MGOGETPHYSICAL(X1,Y1,X2,Y2)

          REAL X1   !X device coordinate, lower left corner of device
          REAL Y1   !Y device coordinate, lower left corner of device
          REAL X2   !X device coordinate, upper right corner of device
          REAL Y2   !Y device coordinate, upper right corner of device
This routine will return the device coordinates of the lower
left and upper right corner of the plotting device. The default values
are the absolute device limits and they depend upon the device chosen.
MGOGETLOC and MGOGETPHYSICAL are useful when
the plot region must be repositioned or changed in size.
          SUBROUTINE MGOGETPALETTE(N,R,G,B)

          INTEGER N   !Color table entry index (0-31) (input)
          REAL R      !Value of the red component of the color (output)
          REAL G      !Value of the green component of the color (output)
          REAL B      !Value of the blue component of the color (output)
This routine will return the red, green, and blue components
R, G, B of the current color table entry. The returned
values of R, G, B will range between zero and one. The
value of N must lie between 0 and 31 inclusive. This
routine is most useful for debugging purposes, especially when an
unexpected color appears.
          SUBROUTINE MGOFILEPLOT(FILENAME)

          CHARACTER(*) FILENAME   !The filename of the generated plot
This routine is very similar to MGOPRNTPLOT except that it writes a
PostScript or encapsulated PostScript file rather than generating the
plot on a printer. On UNIX systems, FILENAME can be any
legal filename that has a '.ps' or '.eps' suffix. These suffixes
request PostScript or encapsulated PostScript files, respectively. If
the suffix is not correct, the routine returns with an error message
but it does nothing else. It is the equivalent of the
HARDCOPY command of the interactive mode when a filename
has been specified with the PRINTER command.
          SUBROUTINE MGOISOBOX(LABELX,LABELY)

          INTEGER LABELX   !Controls the label and tick format on the x axis.
          INTEGER LABELX   !Controls the label and tick format on the y axis.
This routine encloses the graphics area in a coordinate box. This
routine differs from 'MGOBOX' in that the x and y scaling are
isotropic. That is, it forces the aspect ratio to be such that a
circle in world coordinates will look like a circle on the plot. The
arguments control the orientation of the tick labels on the x and y
axes respectively. The routine will attempt to honor the user selected
physical coordinates of the plot region. However, both x and y
physical coordinates cannot, in general, be honored. So one
appropriate dimension will be honored and the other will be shrunk to
isotropic scaling. Neither dimension will ever increase. The table
below descibes how LABELX and LABELY control
the label and tick format.
| Sign (ticks) |
Hundreds (format) |
Tens (font) |
Ones (orientation) |
|---|---|---|---|
| + tics - no ticks |
0 default 1 0.0 format 2 deg-min-sec 3 hour-min-sec |
0 Roman 1 Plain 2 Tiny |
0 No labels 1 parallel 2 perpendicular 3 No labels |
33DPLOT command,1 AANGLE command, 1 ANGLE subroutine, 1 axis (command) labels, 1 axis (subroutine) labels, 1 AXIS command, 1 AXIS subroutine, 1 BBOX command arguments, 1 BOX command with altered labels, 1 BOX command, 1 BOX subroutine, 1 CChart of subroutines, 1 COLOR command, 1 Command buffer, 1 Comment lines, 1 Common block variables, 1 Common block, 1 CONNECT command, 1 CONNECT subroutine, 1 CONTOUR command, 1 CONTOUR subroutine, 1 CURSOR command, 1, 2, 3 DData arrays, 1 DATA command, 1 Data files, 1 Data stdin, 1 DEFINE command, 1 DELETE command, 1 DEVICE command, 1 Device coordinates, 1 Device numbers, 1 DEVICE subroutine, 1 DOT command, 1 DRAW command, 1 DRAW subroutine, 1 EECOLUMN command, 1 END command, 1 Environment assignment (UNIX), 1 ERASE command, 1 ERASE subroutine, 1 ERRORBAR command, 1 ERRORBAR subroutine, 1 Exiting from MONGO, 1 EXPAND command, 1 FFILL command, 1 Font table, 1 FORMAT command, 1 GGDRAW subroutine, 1 Graphics area, 1 GRELOCATE subroutine, 1 GRID command, 1 GRID subroutine, 1 GSTRING subroutine, 1 GSTRLEN subroutine, 1 HHALFTONE command, 1 HALFTONE subroutine, 1 HARDCOPY command, 1 Hardcopy plots, 1 HATCH subroutine, 1 HELP command, 1 HISTOGRAM command, 1 HISTOGRAM hatching, 1 HISTOGRAM subroutine, 1 IID command, 1 INFO command, 1 INIT subroutine, 1 INPUT command, 1 INSERT command, 1 Installation, compilation, 1 Installation, final, 1 Installation, hardcopy devices, 1 Installation, mongofiles, 1 Installation, rasterizer commands, 1 Installation, rasterizer compilation, 1 Installation, rasterizer procedures, 1 Installation, testing, 1 Installation, 1 Interactive command format, 1 Interactive mode changes, 1 Interactive mode, 1 Interpreter mode, 1 JKLLABEL command, 1 Label options, 1, 2 LABEL subroutine, 1 |
LCOLUMN command, 1 LIMITS command, 1 LINE subroutine, 1 Line types, 1, 2 LINES command, 1, 2 Linking to MONGO (UNIX), 1 Linking to MONGO (VMS), 1 LIST command, 1 LOCATION command, 1 Logical assignment (VMS), 1 LPOINTS command, 1 LTYPE command, 1 LWEIGHT command, 1 MMacro arguments, 1 Macros, 1 Mode, interactive, 1 Mode, interpreter, 1 Mode, subroutine, 1 MONGO (file), 1 MONGO subroutine, 1 NOPPAGE command, 1 PAGE subroutine, 1 PCOLUMN command, 1 PHYSICAL command, 1 PLAYBACK command, 1 PLOTID subroutine, 1 PLT3D subroutine, 1 Point styles, 1 POINT subroutine, 1 Point types, 1 POINTS command, 1 POINTS subroutine, 1 PRINTER command, 1 PRINTER subroutine, 1 PRNTPLOT subroutine, 1 PSETUP subroutine, 1 PTYPE command, 1 PUTLABEL command, 1 PUTLABEL subroutine, 1 QRRELOCATE command, 1 RELOCATE subroutine, 1 Running MONGO, 1 SSample FORTRAN program (interpreter), 1 Sample FORTRAN program (subroutine), 1 Sample interactive plots, 1 SET command, 1 SETANGLE subroutine, 1 SETEXPAND subroutine, 1 SETLIM subroutine, 1 SETLOC subroutine, 1 SETLTYPE subroutine, 1 SETLWEIGHT subroutine, 1 SETPHYSICAL subroutine, 1 SETUP subroutine, 1 SHOW command, 1 Subroutine mode, 1 Suntools, 1 Symbolic variables, 1 TTCLOSE subroutine, 1 TERMINAL command, 1 TICKSIZE command, 1 TICKSIZE subroutine, 1 TIDLE subroutine, 1 TSETUP subroutine, 1 UUnit numbers, 1 User coordinates, 1 User variables, 1 VVFIELD command, 1 VFIELD subroutine, 1 WWINDOW command, 1 WINDOW subroutine, 1 WRITE command, 1 XXCOLUMN command, 1 XCOLUMN with negative argument, 1 XLABEL command, 1 XLABEL subroutine, 1 XLOGARITHM command, 1 YYCOLUMN command, 1 YLABEL command, 1 YLABEL subroutine, 1 YLOGARITHM command, 1 Z |